Table of Contents
- This guide will walk you through the process Explanation guide on "Payroll details section field" using Bitkode.
- Step 1. Click Payroll Details
- Step 2. Employment Details section
- Step 3. Switch on
- Step 4. Click "Spouse Full Name (Only if Married)"
- Step 5. Create a second FS3
- Step 6. Previous Emoluments
- Step 7. FSS Status
- Step 8. Custom Value
- Step 9. Participating in Special Overtime Tax (15%)
- Step 10. SCC Details
- Step 11. Other Details
- Step 12. Setting Toggle
- Step 13. Remarks for any additional information
- Step 14. Click "Save"
- Step 15. Errors detected
This guide will walk you through the process Explanation guide on “Payroll details section field” using Bitkode. #
Step 1. Click Payroll Details #
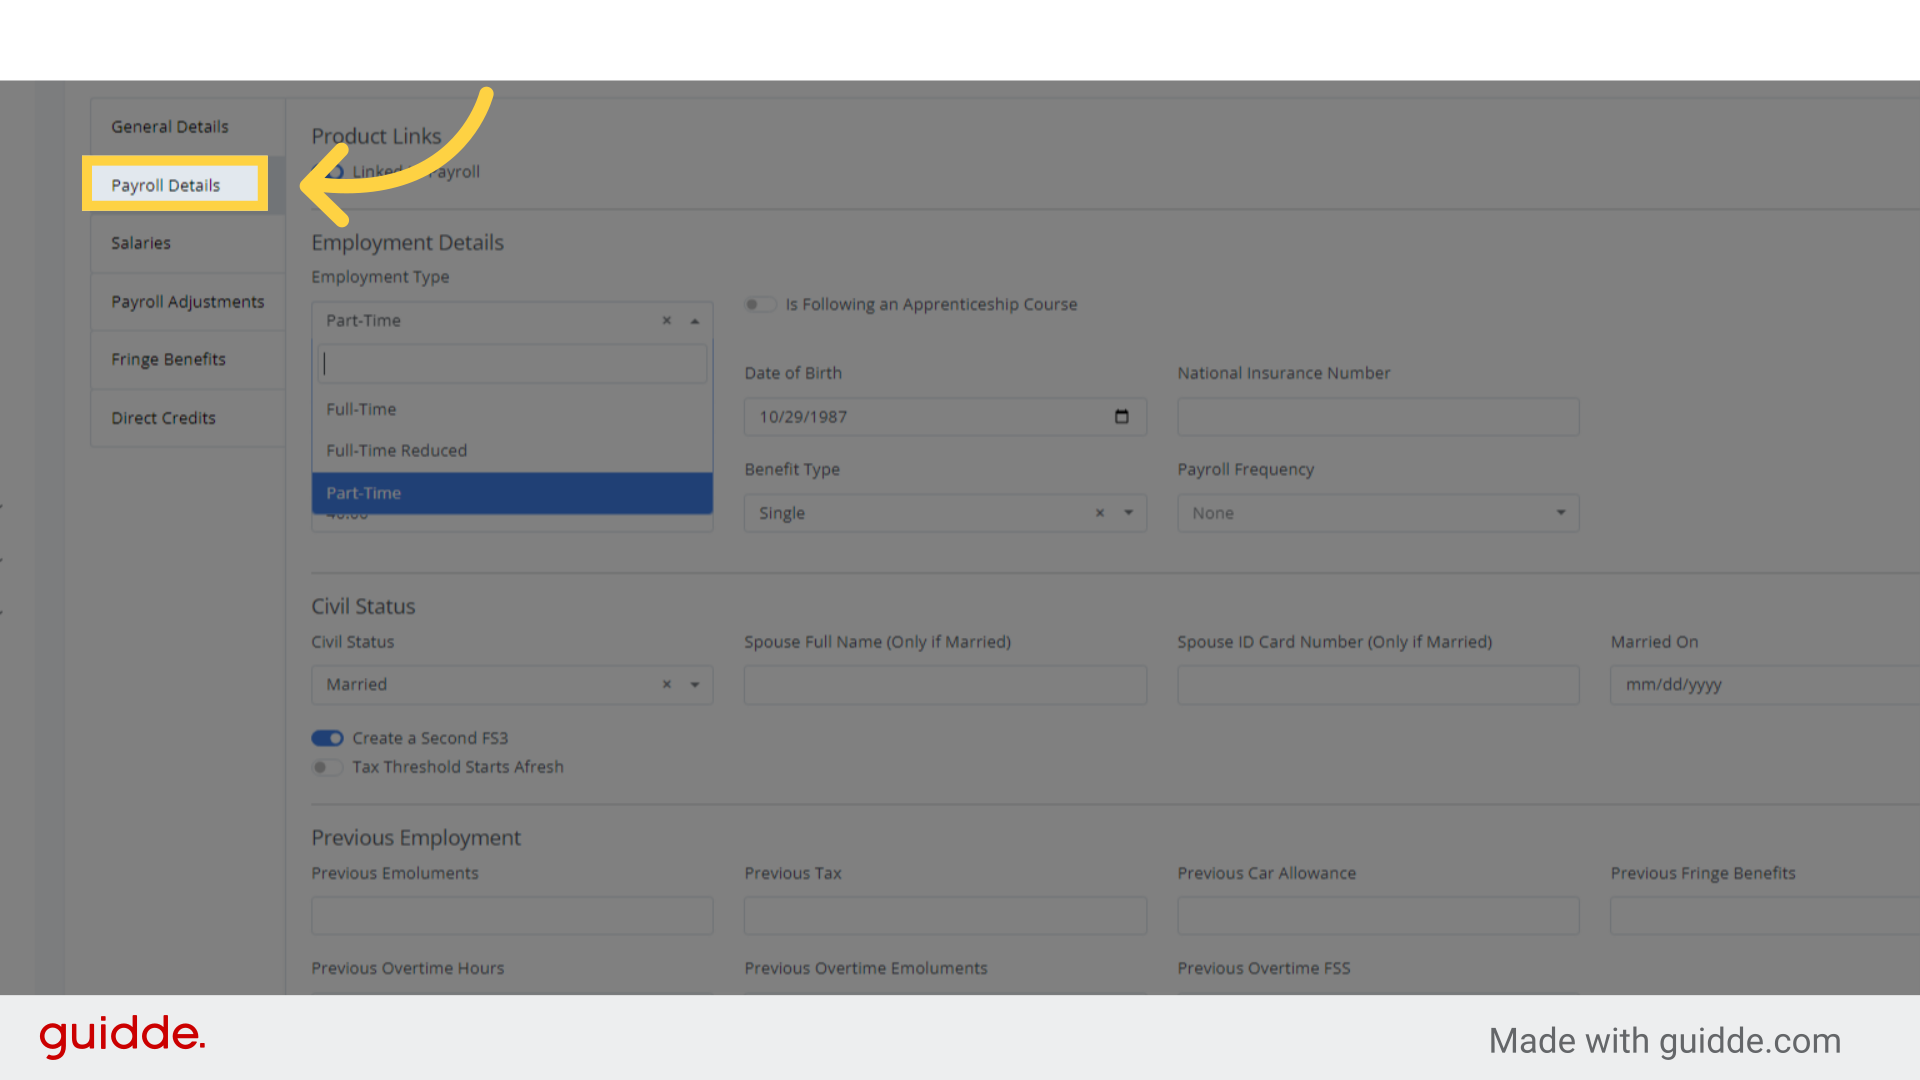
Begin by selecting the “Payroll Details” option.
Step 2. Employment Details section #
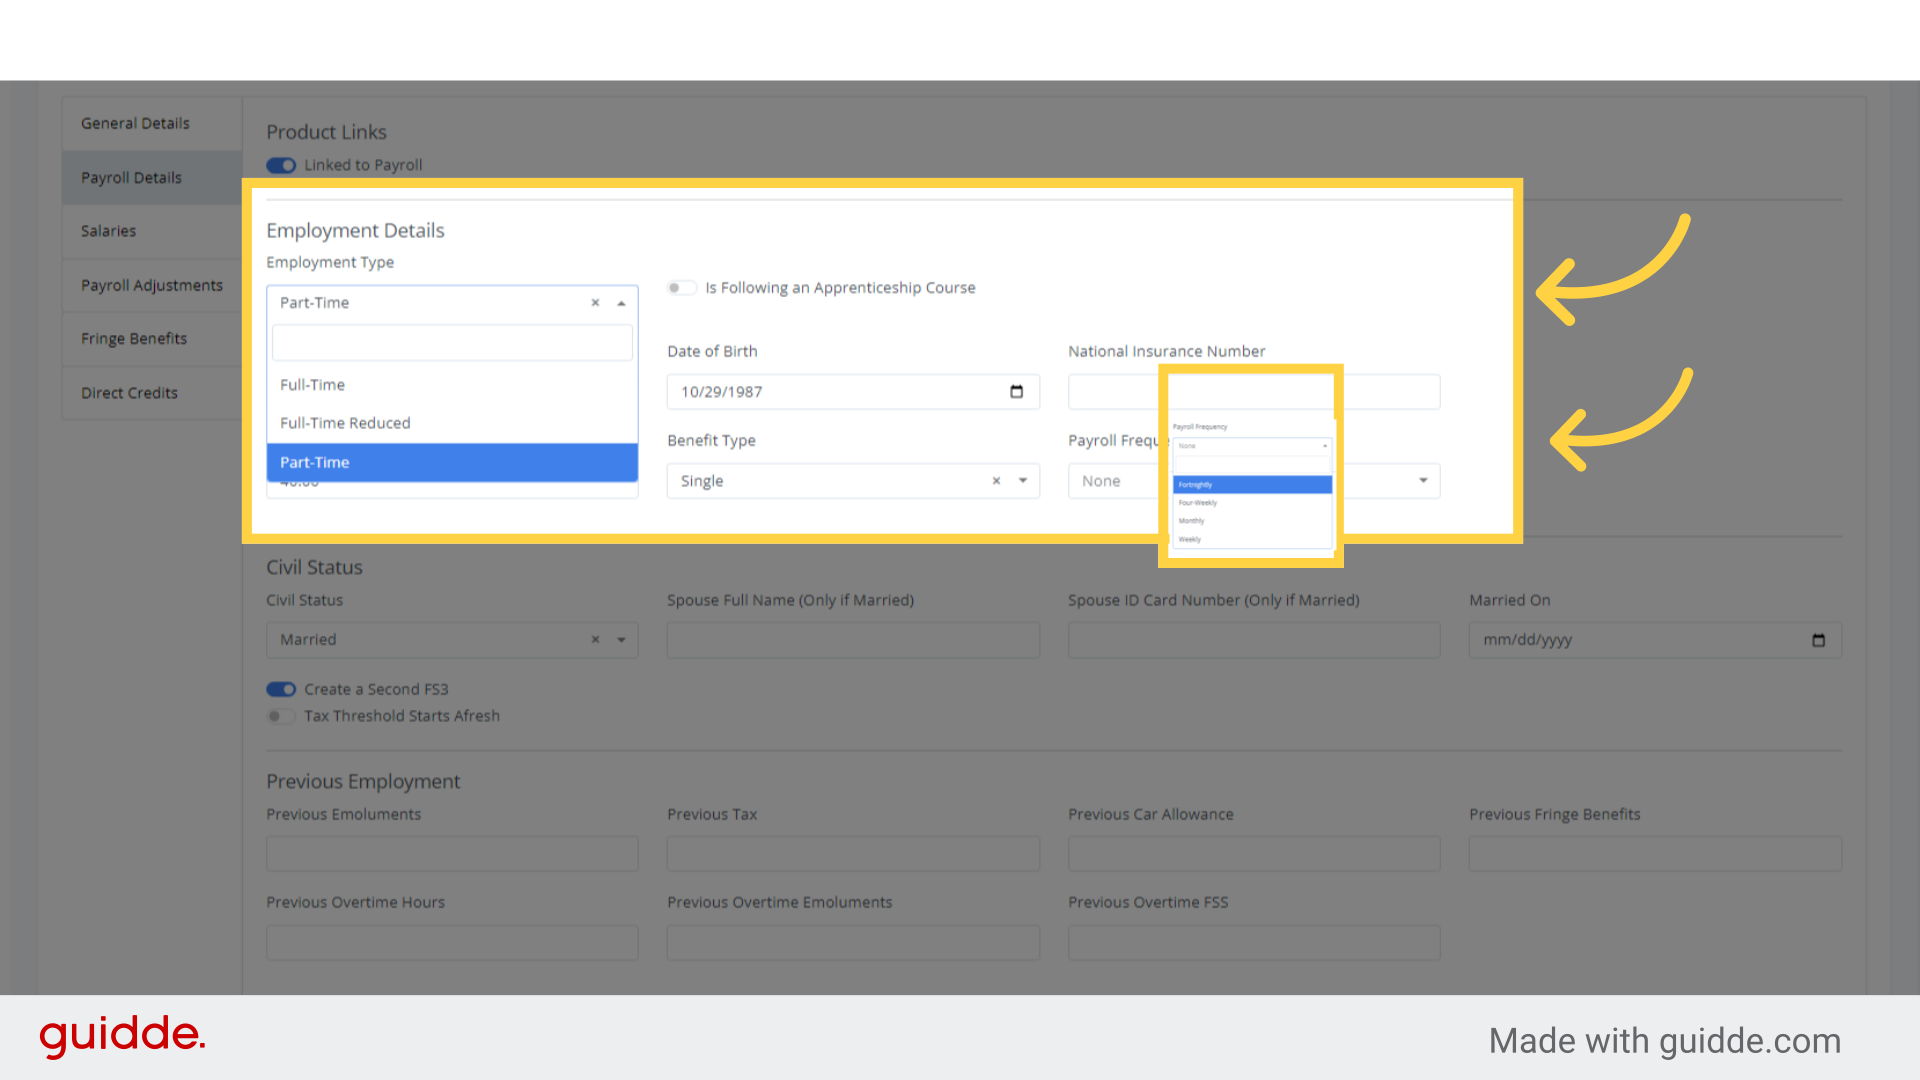
Upon accessing the payroll details section, commence by enumerating the following:
type of employment, birth date, National Insurance number (if applicable), average hours worked per week, type of benefits, and the frequency of payroll distribution.
It’s important to note that the payroll can be processed on a fortnightly, four-weekly, monthly, or weekly basis, according to preference.
Step 3. Switch on #
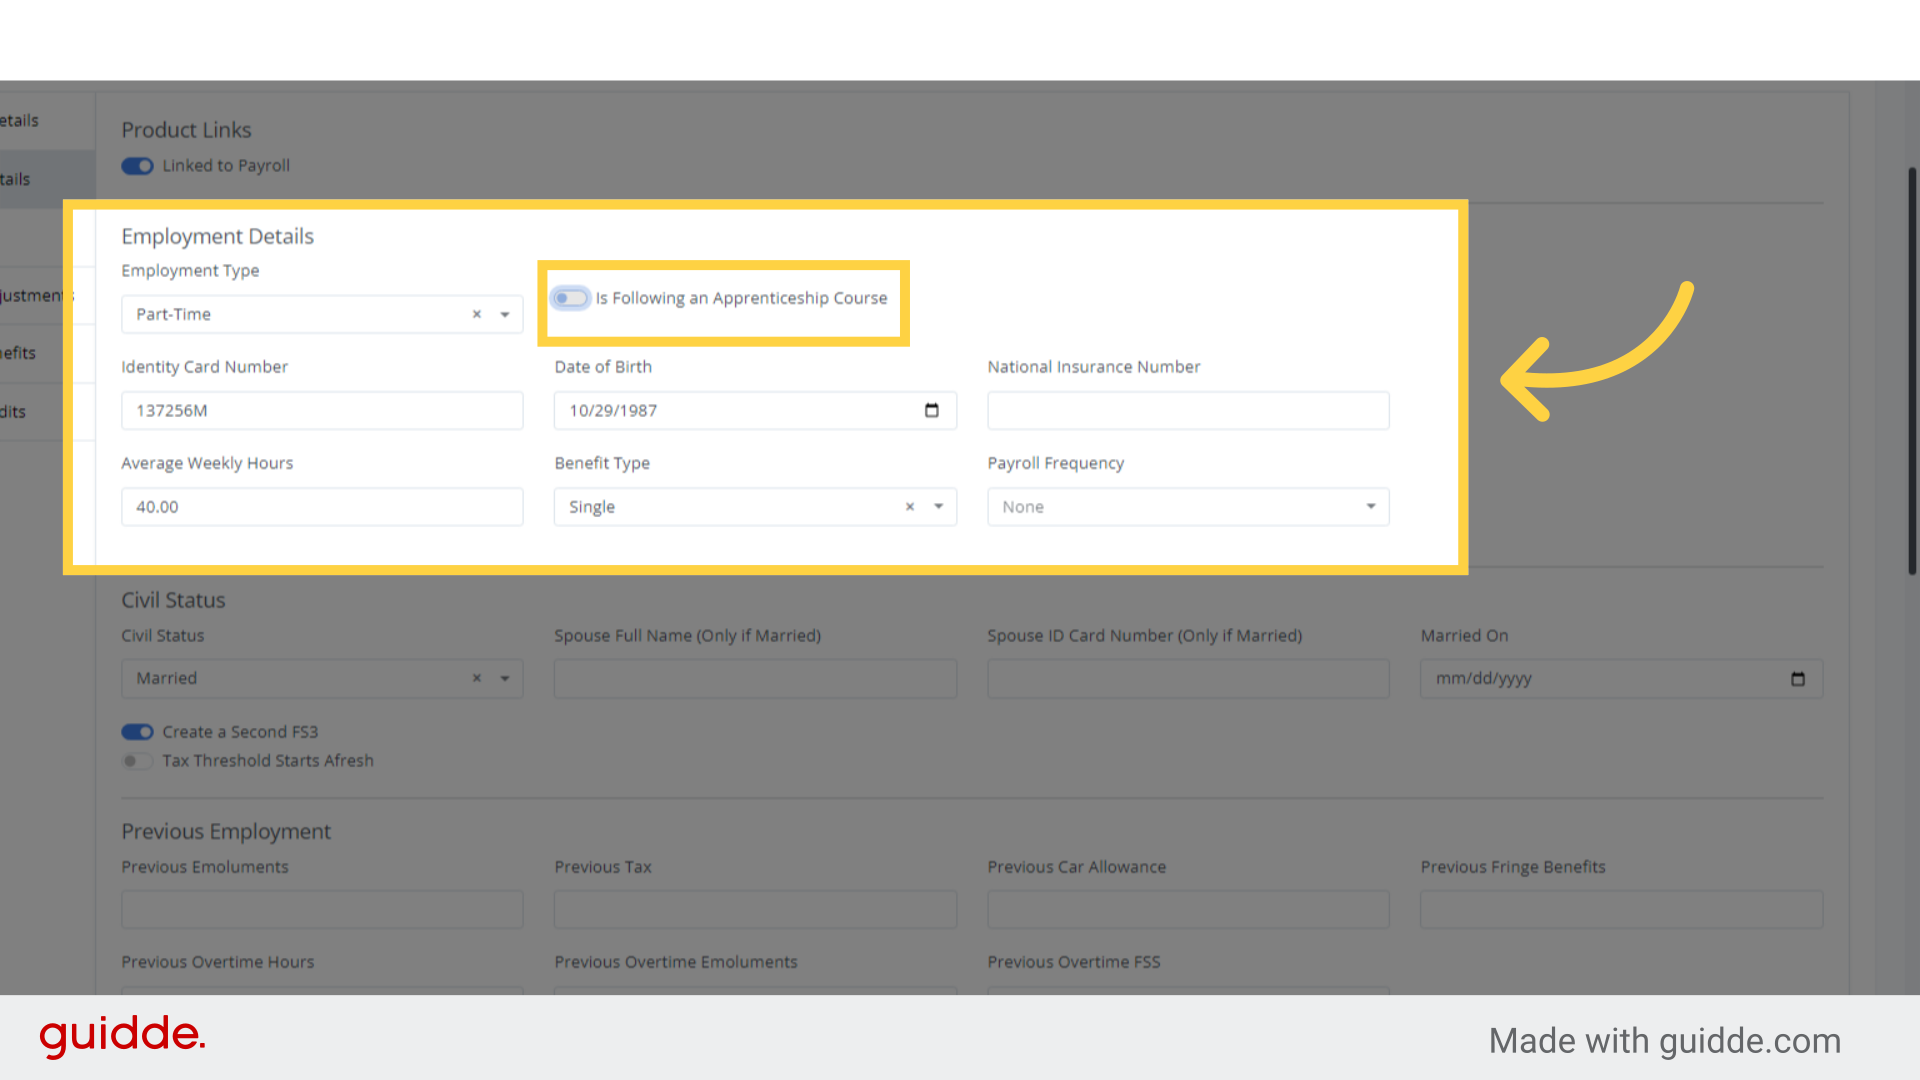
In documenting the employment details, you’ll notice an option to indicate whether the employee is enrolled in an apprenticeship program.
By selecting this option, it will result in only the National insurance category E and F being deducted, and the system will automatically apply this deduction when the function is activated.
Step 4. Click “Spouse Full Name (Only if Married)” #
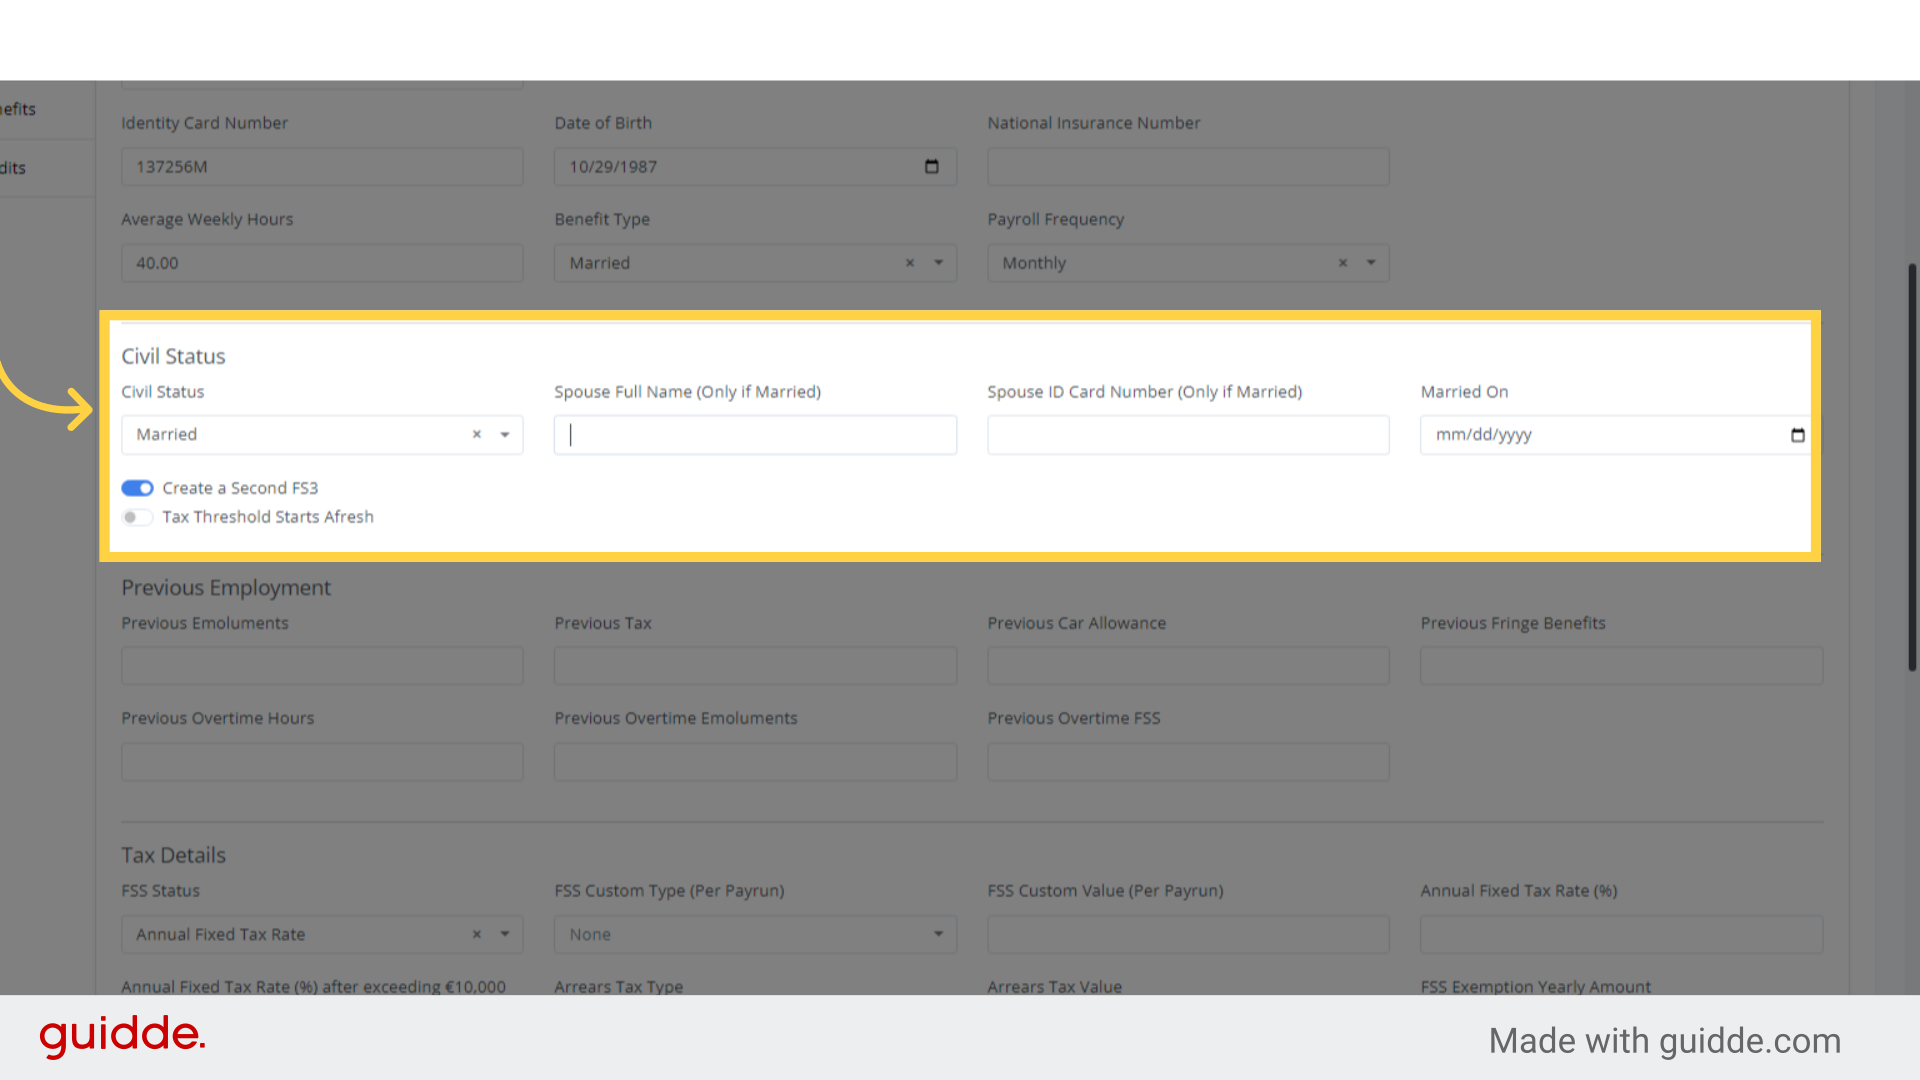
After completing the Employee details section, proceed to the Civil Status section.
Here, you will need to specify the civil status, selecting either ‘Single’ or ‘Married’.
For married employees, it is mandatory to provide the spouse’s full name and ID card number
Step 5. Create a second FS3 #
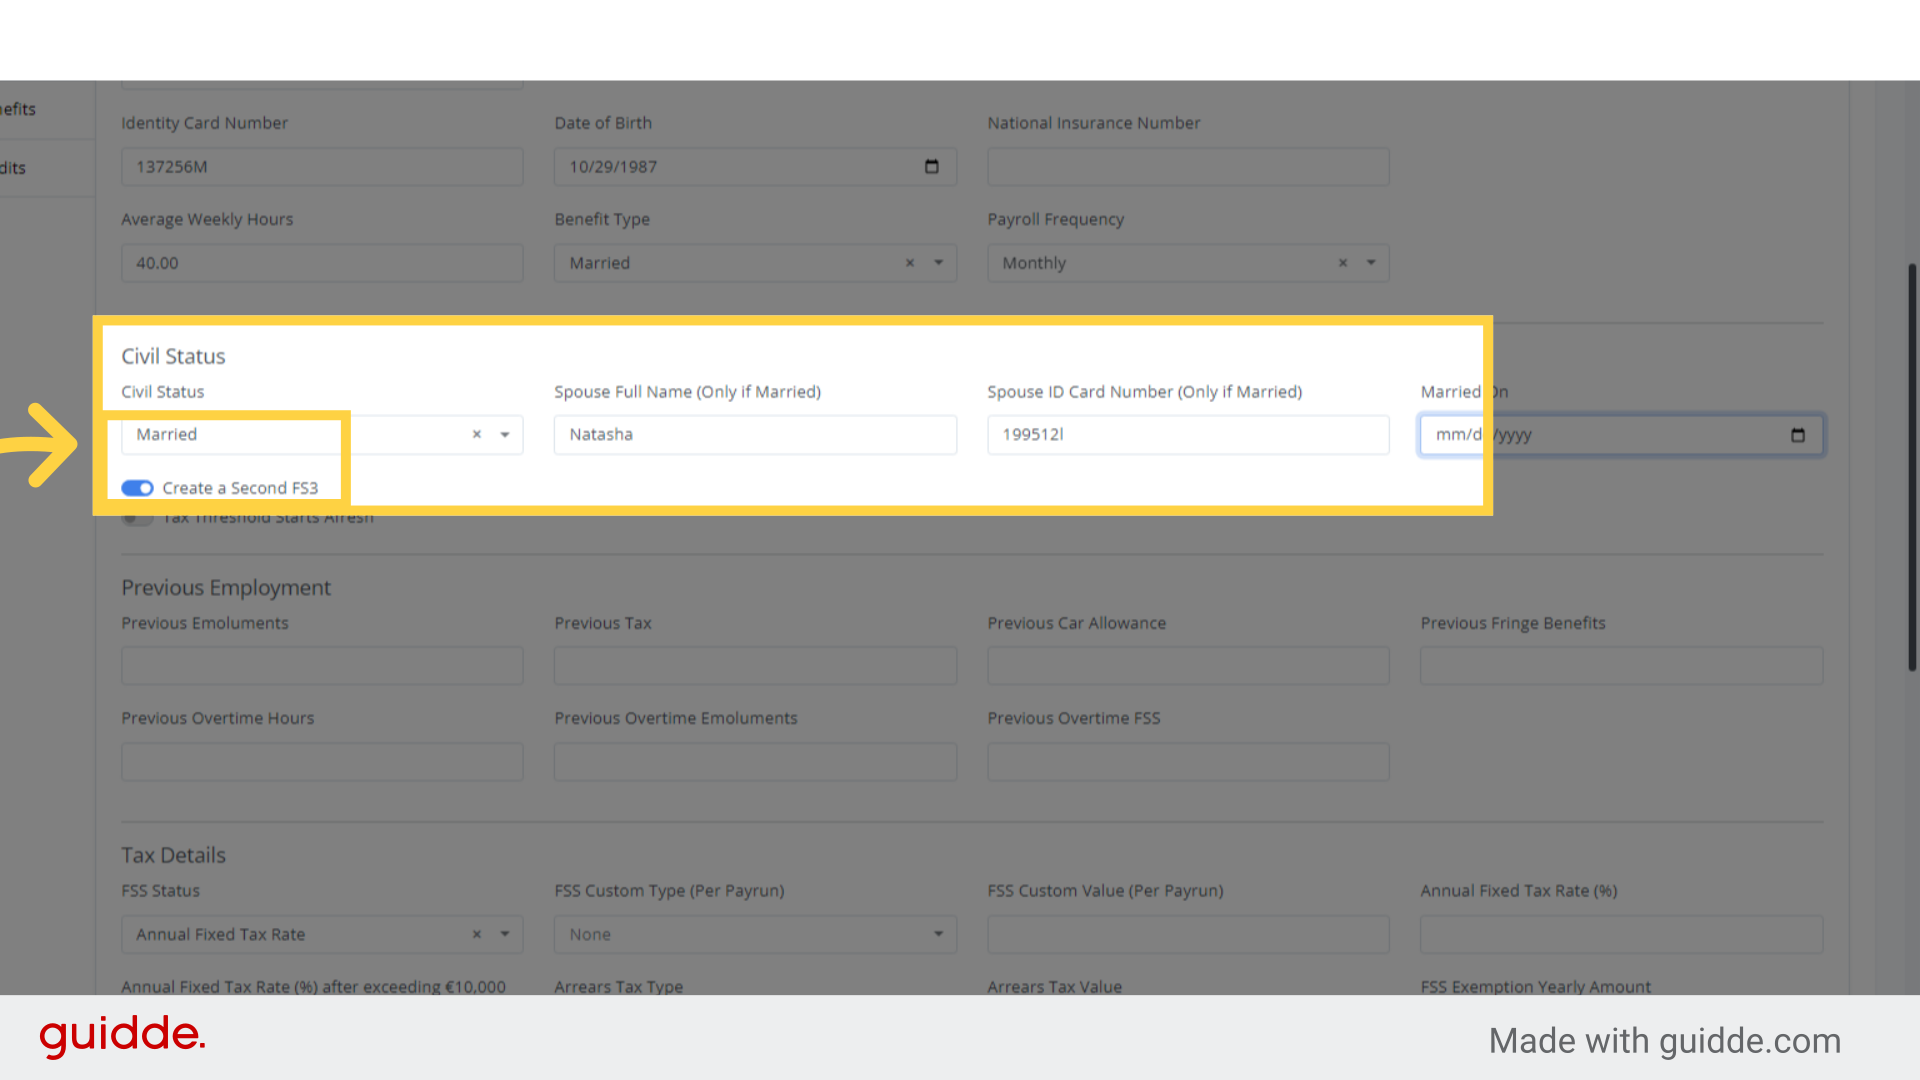
In the Civil Status section, there’s an option to select ‘Create a second FS3’.
By choosing this, along with ‘Start Fresh’ for the tax threshold, it signifies that the system will generate a new FS3 and recalculate taxes from scratch.
For instance, at the start of the year, a couple is recognized as two distinct legal entities.
Upon marriage, they become a single unit in legal terms, comprising the primary earner and their spouse.
The spouse who is not the primary earner will receive a new FS3 starting from the date of marriage.
Step 6. Previous Emoluments #
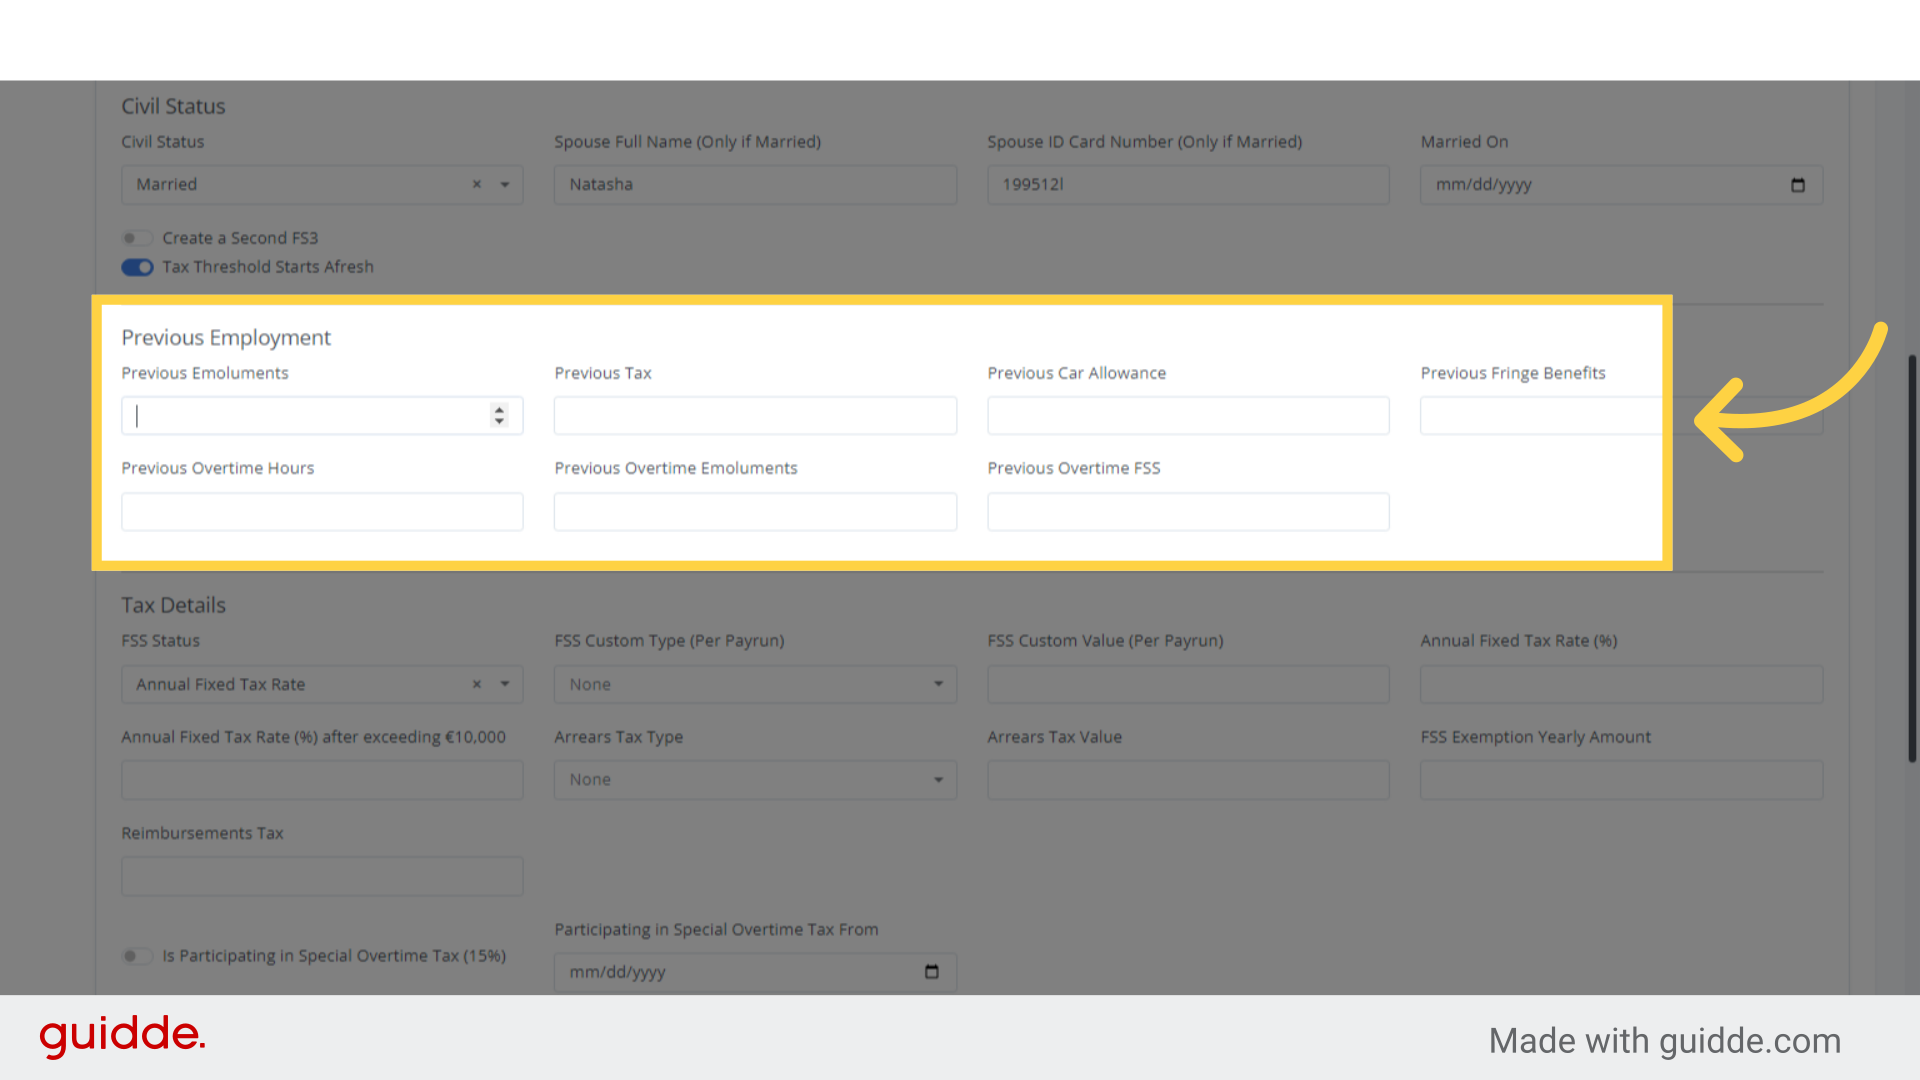
Once the civil status details are entered, proceed to the previous employment section.
In this part, you are required to provide particulars from the latest FS3 provided by the past employer.
The necessary details include previous tax, car allowance (where relevant), fringe benefits (if present), along with overtime hours worked, overtime compensation, and overtime social security contributions.
Note that this section should be completed only if the employee has been employed within the current calendar year.
Step 7. FSS Status #
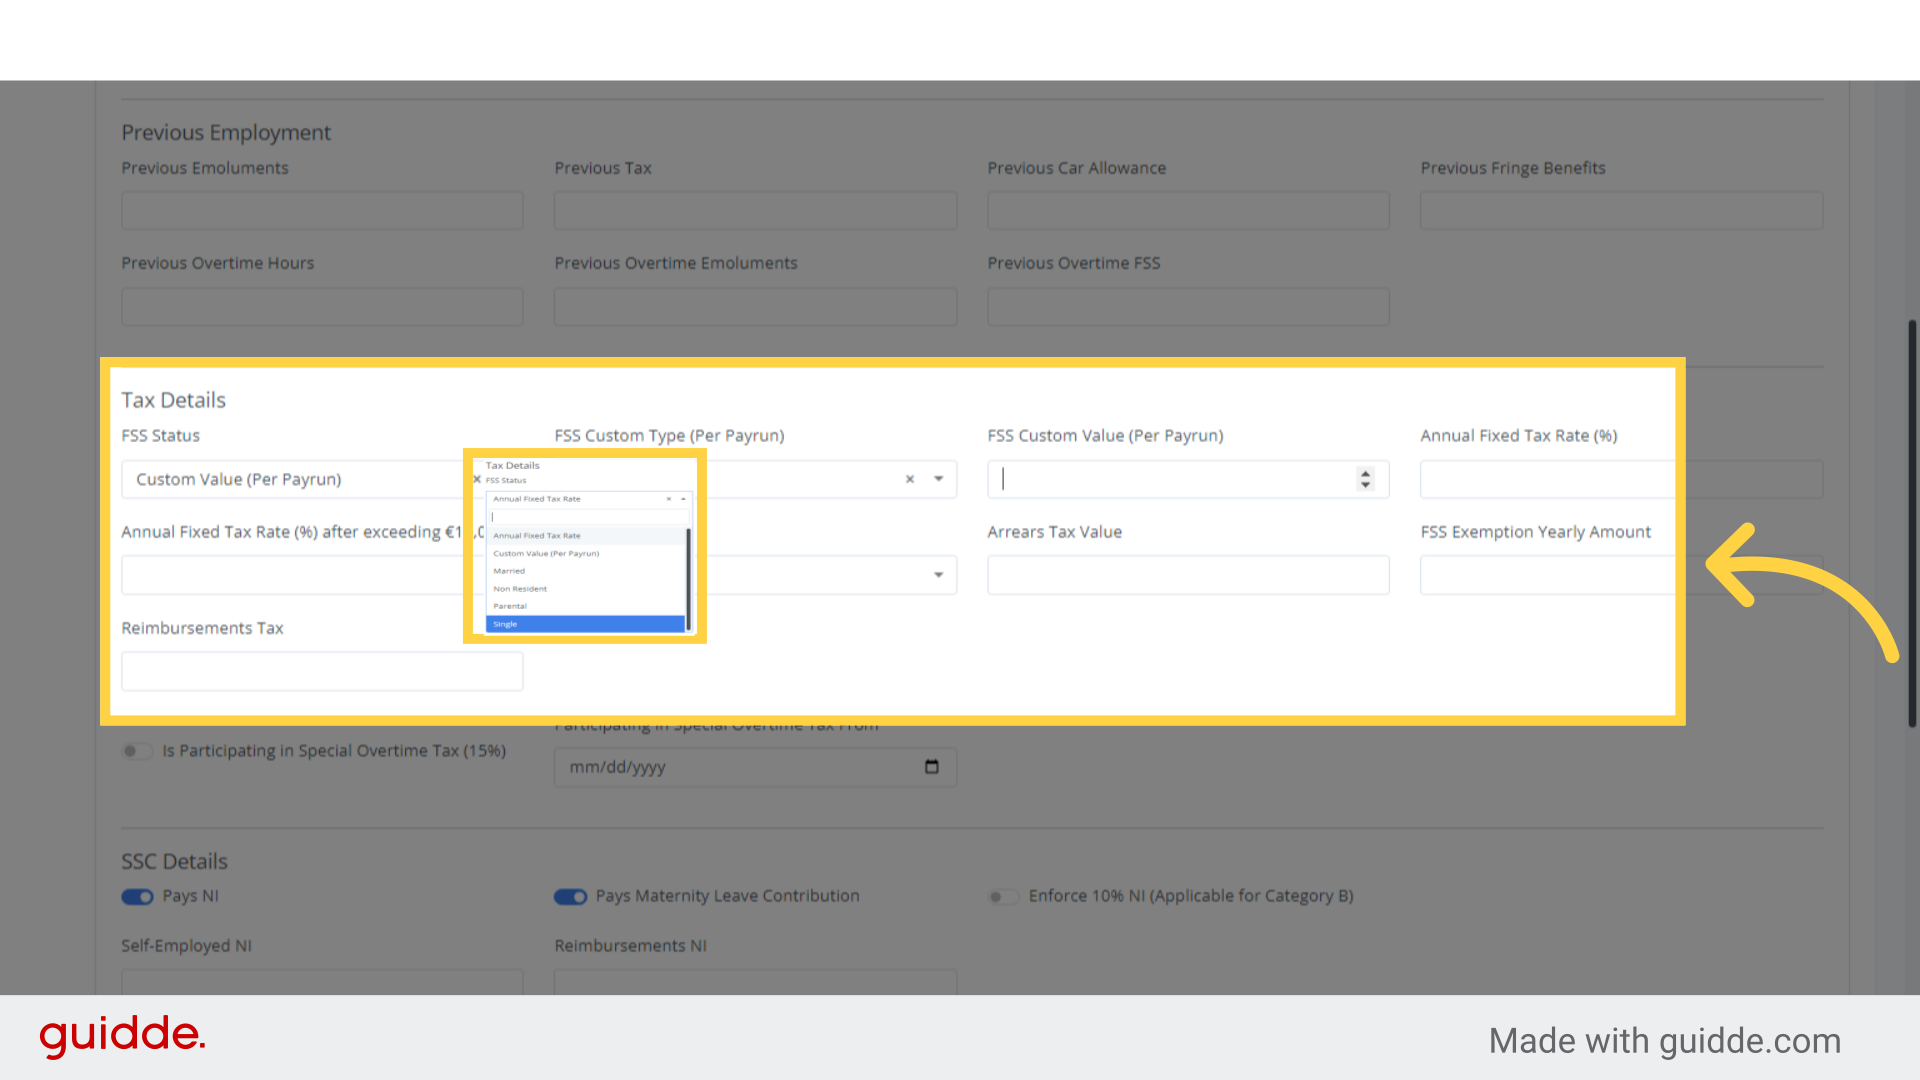
Upon completion of the previous employment section, the next step is to enter the tax information.
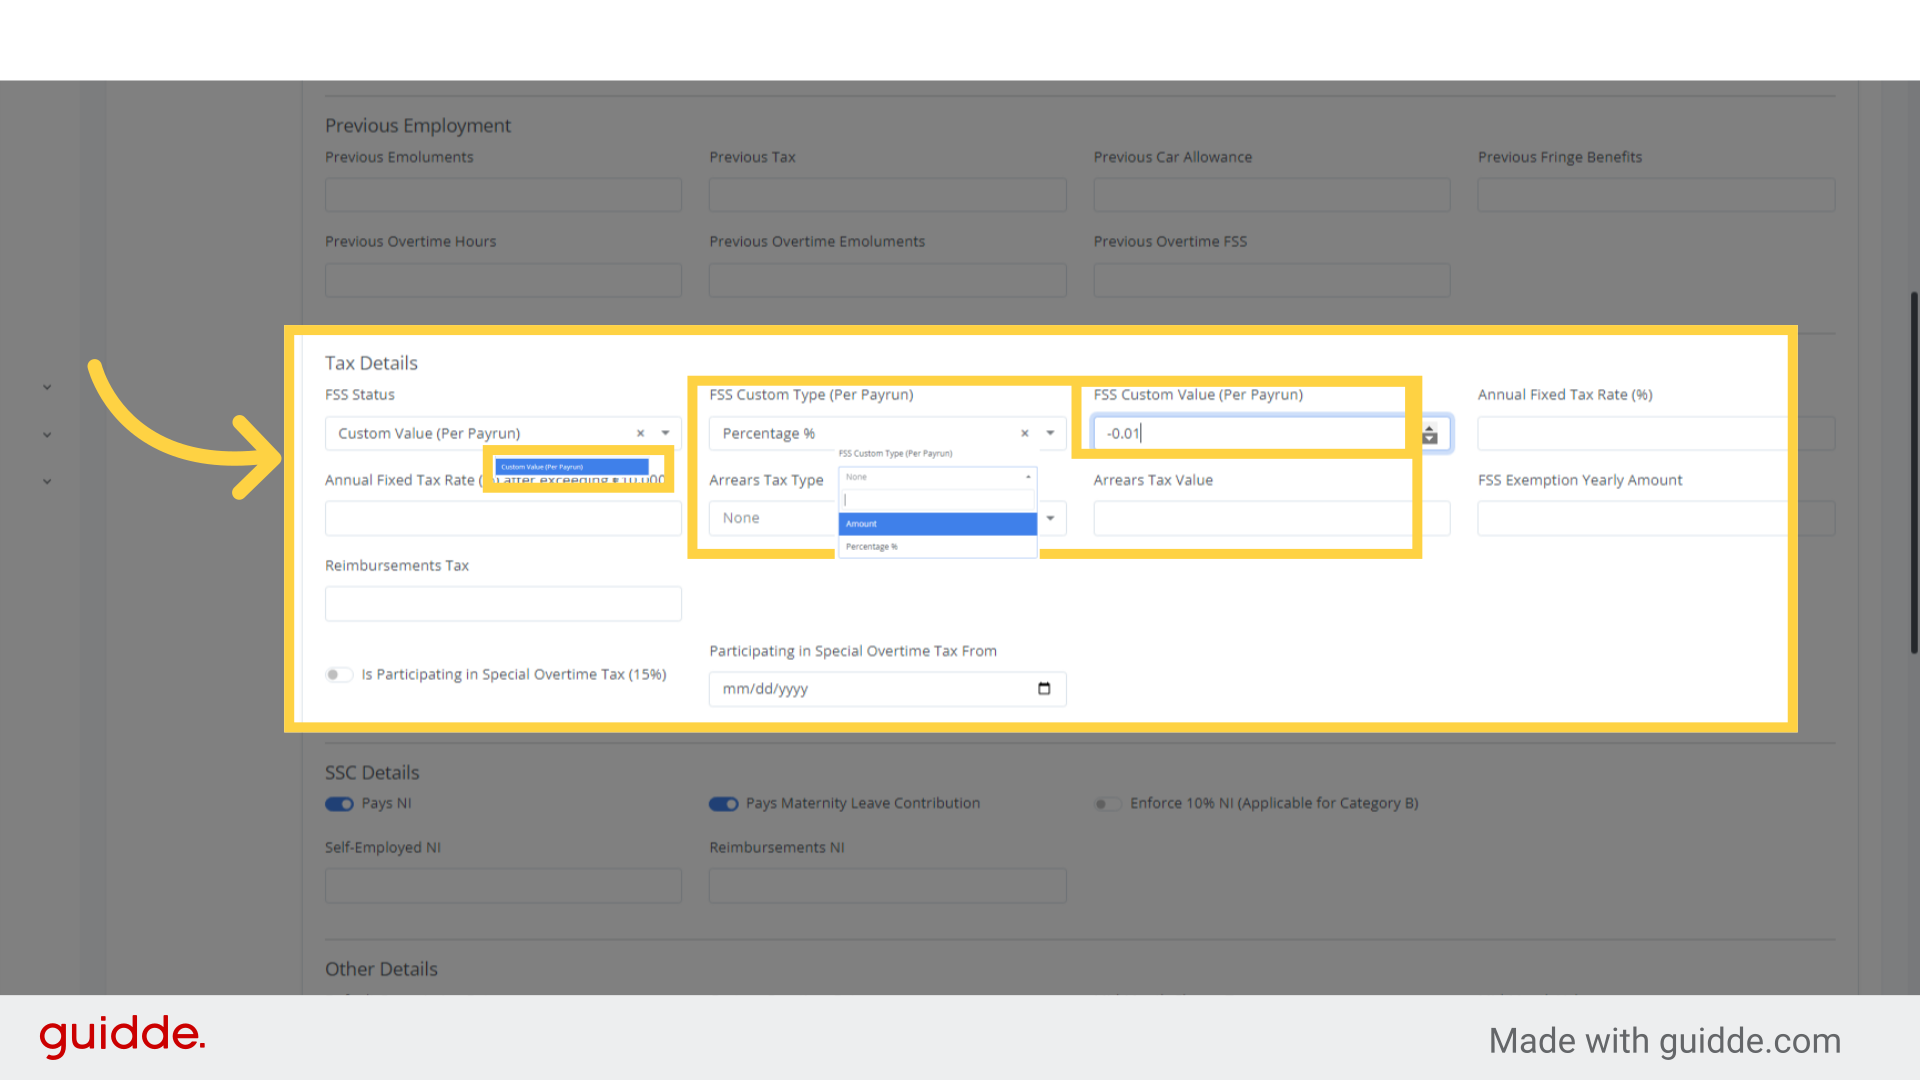
Begin with the FSS status, which includes options such as the annual fixed tax rate, custom value (per pay period), married, non-resident, and parental OR single.
Selecting an FSS status will prompt the system to calculate the tax deductions based on the selected status and the salary details provided.
Step 8. Custom Value #
When selecting the Custom value (per pay period), ensure it aligns with the established FSS custom type.
The system will only allow this choice if the custom type has been predefined.
You have the flexibility to determine this value as either a specific amount or a percentage, as needed.
Step 9. Participating in Special Overtime Tax (15%) #
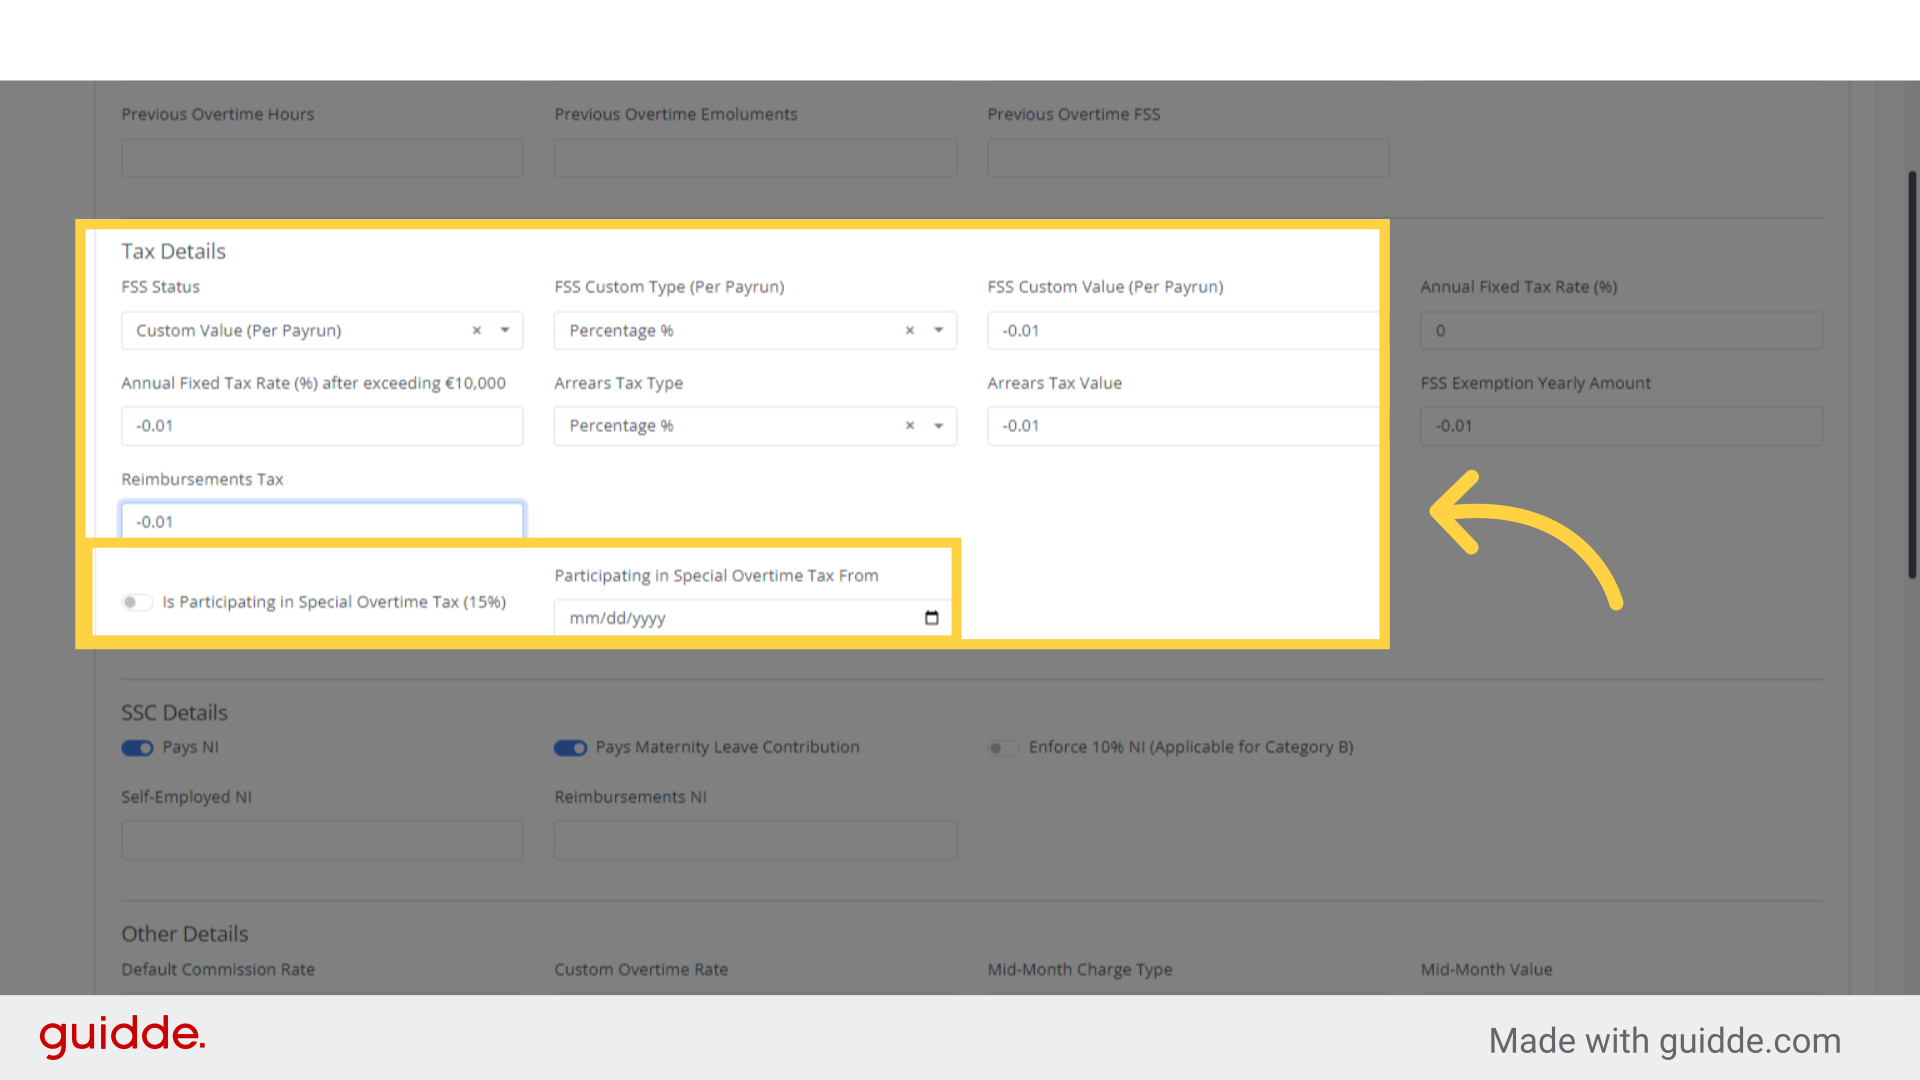
Selecting the Special Overtime Tax option in the tax details activates a 15% tax rate on qualified overtime for full-time, non-managerial staff with weekly earnings up to €375, starting from January 1, 2020.
This tax is limited to 100 hours of overtime and cannot exceed twice the standard hourly wage.
Employers deduct this tax as per FSS regulations.
Employees have the choice to opt out, and the tax is definitive unless it’s included in their tax return or if Revenue suggests otherwise.
Step 10. SCC Details #
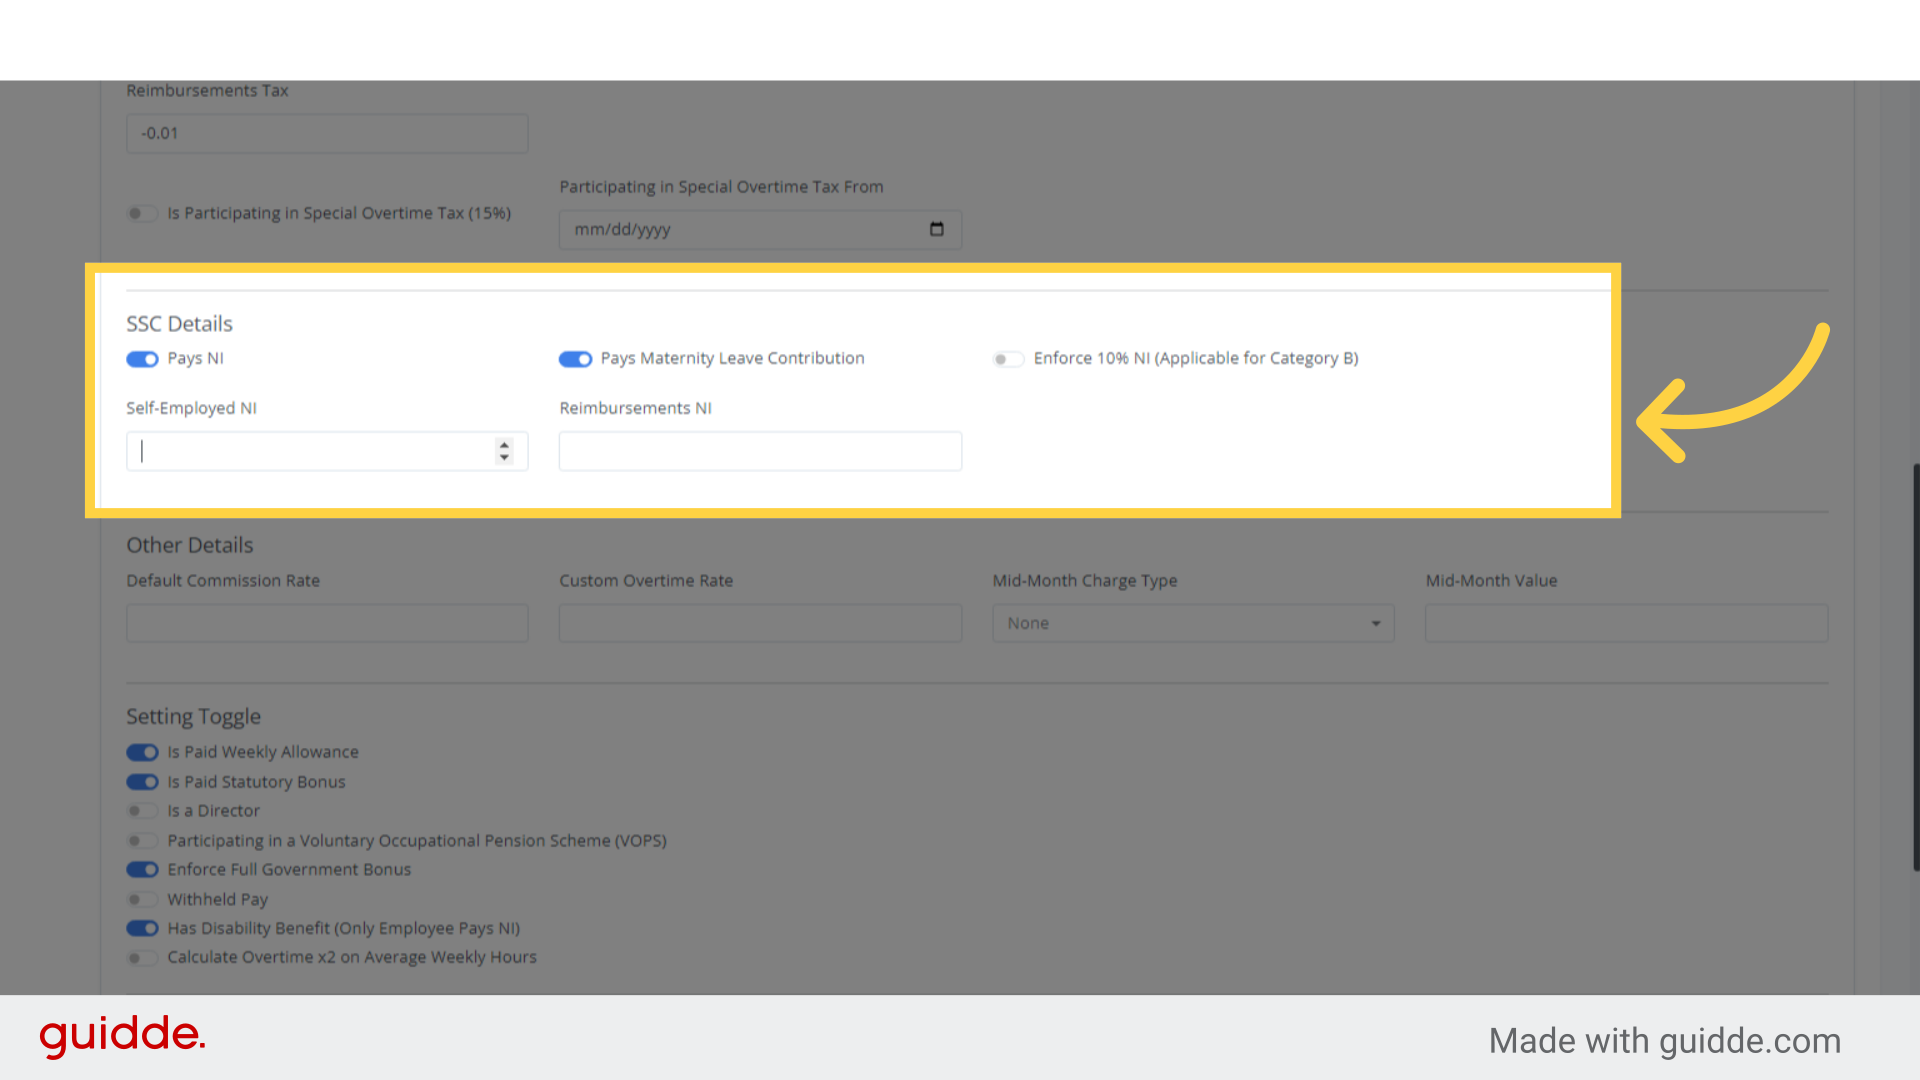
After opting for the Special Overtime Tax, the next step involves the SCC (Social Contribution Collection) details.
Here, you can specify whether to pay National Insurance, contribute to maternity leave, or apply the 10% National insurance rate.
These selections determine the relevant deductions and contributions for the employee’s payroll.
Step 11. Other Details #
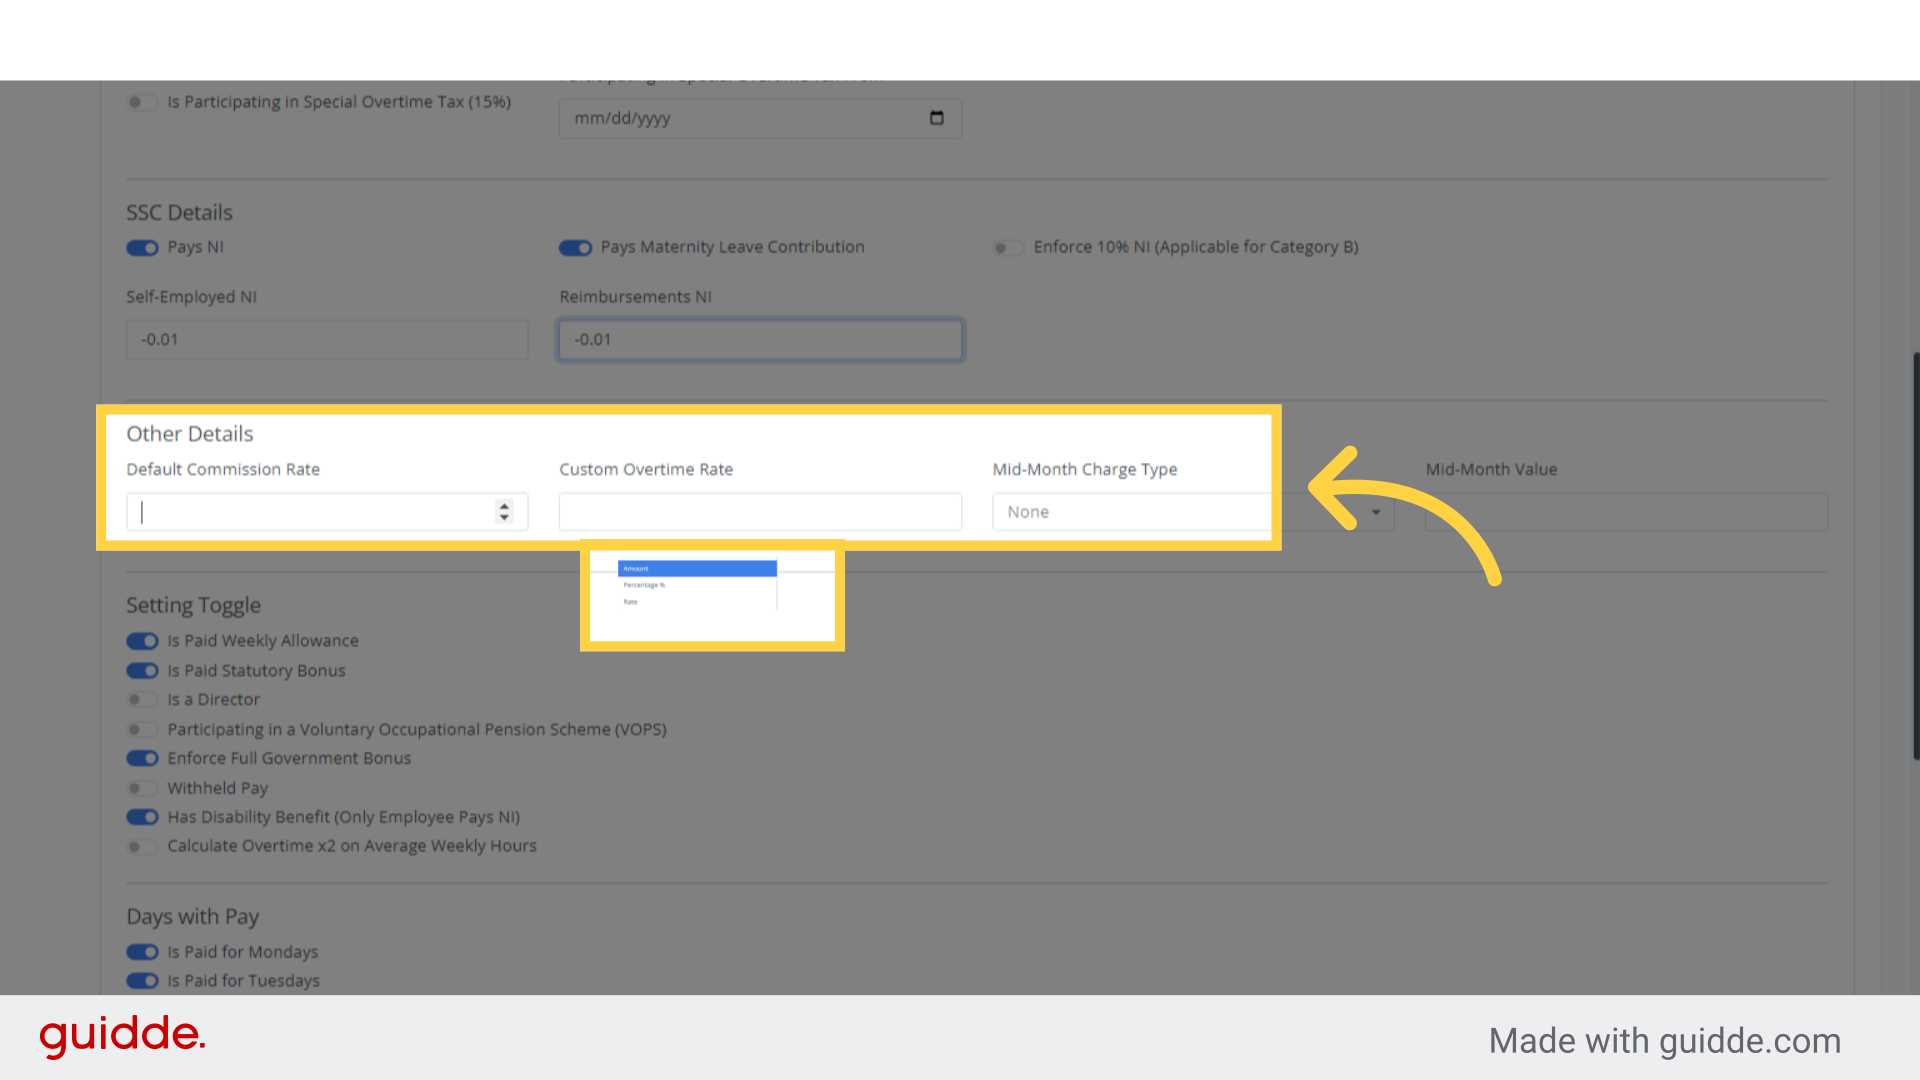
In the next section for further details, the Default Commission Rate is set as a customary rate, usually a percentage, applied to sales.
For instance, a 20% commission rate means a €100 sale leads to a €20 commission (€100 times 20% equals €20).
This rate is typically used for all standard business transactions or within an affiliate program, barring any specific or unique rate arrangements.
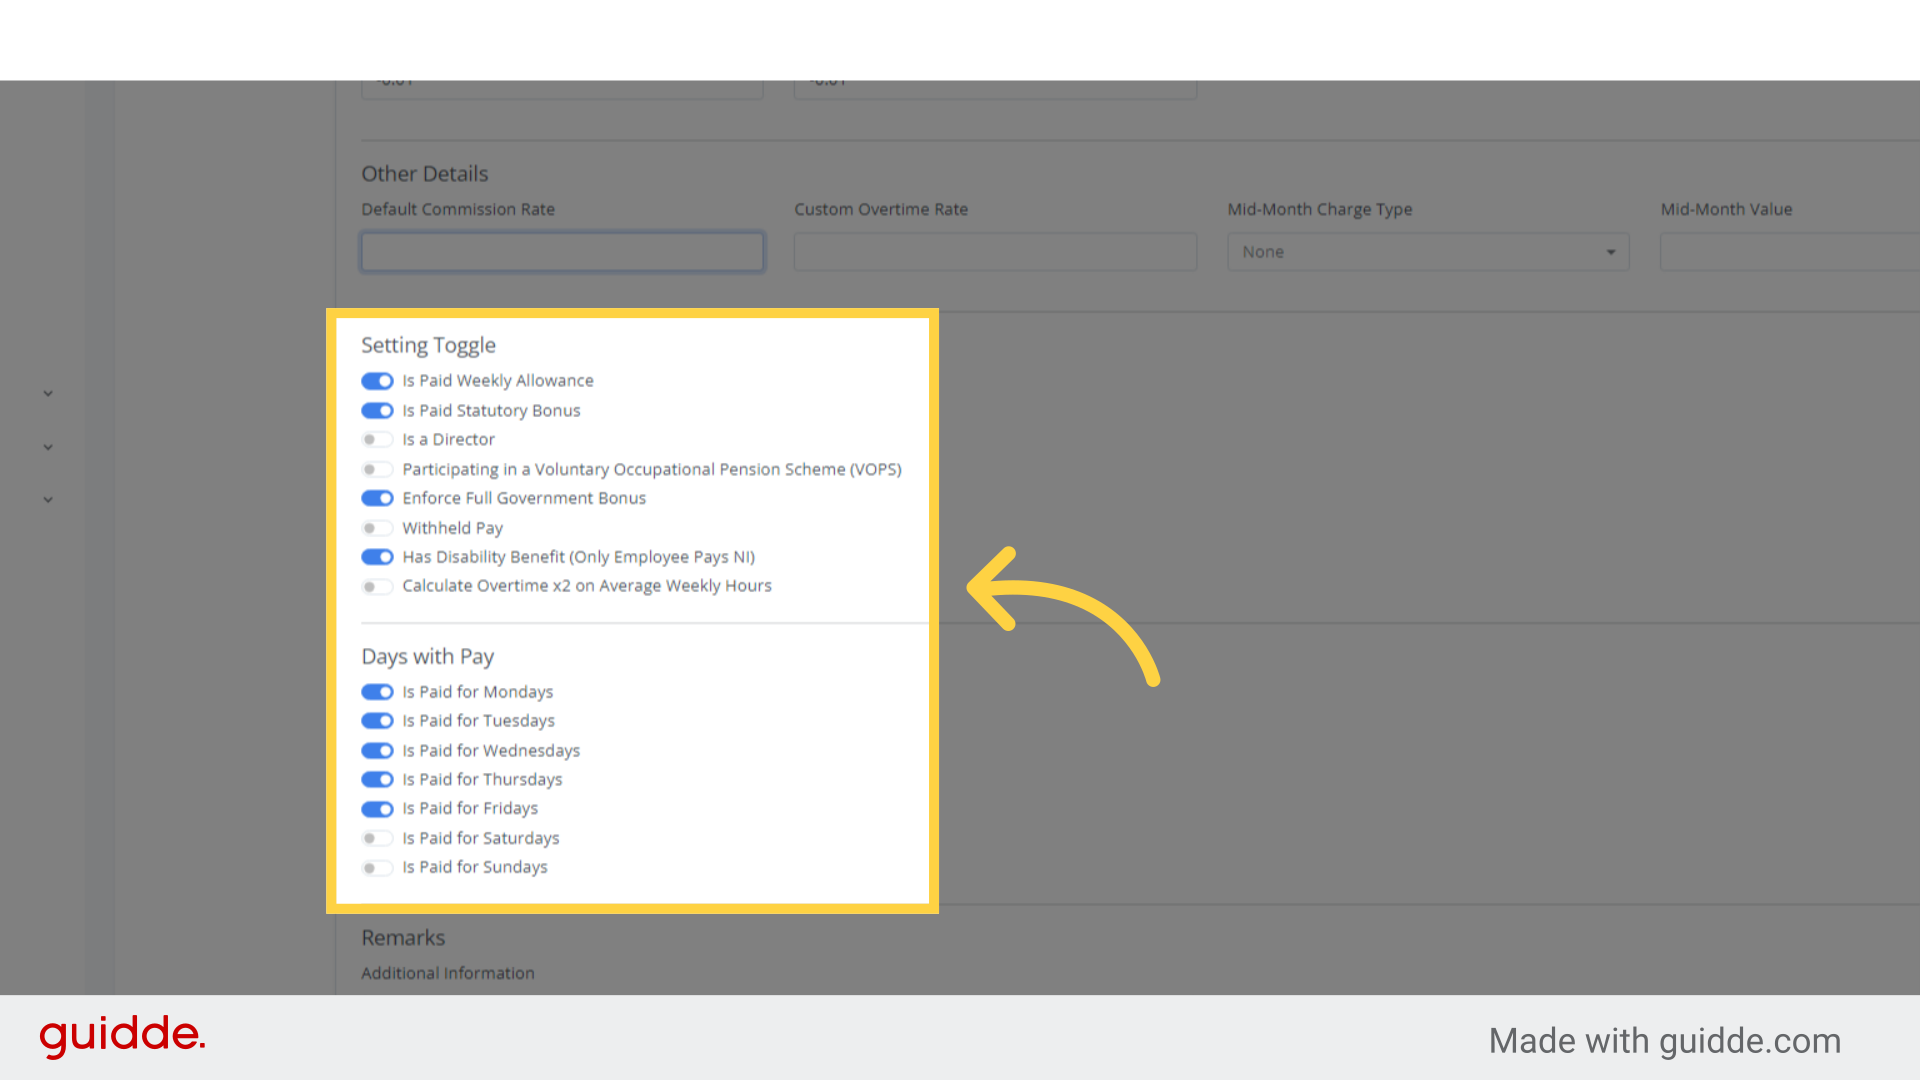
Step 12. Setting Toggle #
Following the section on other details, you can adjust the settings to suit your needs.
Options available include: receiving a weekly allowance, being entitled to a statutory bonus, being a director, participating in a voluntary occupational pension scheme, applying the full government bonus, withholding pay, receiving disability benefits (where only the employee contributes to National Insurance), and calculating overtime at double the rate based on average weekly hours.
Once these preferences are set, the system will automatically calculate all deductions and salaries accordingly.
Additionally, you must specify the days with pay that correspond to the days the employee is compensated for, which will be reflected in the payruns and is necessary for the completion of a payslip.
Step 13. Remarks for any additional information #
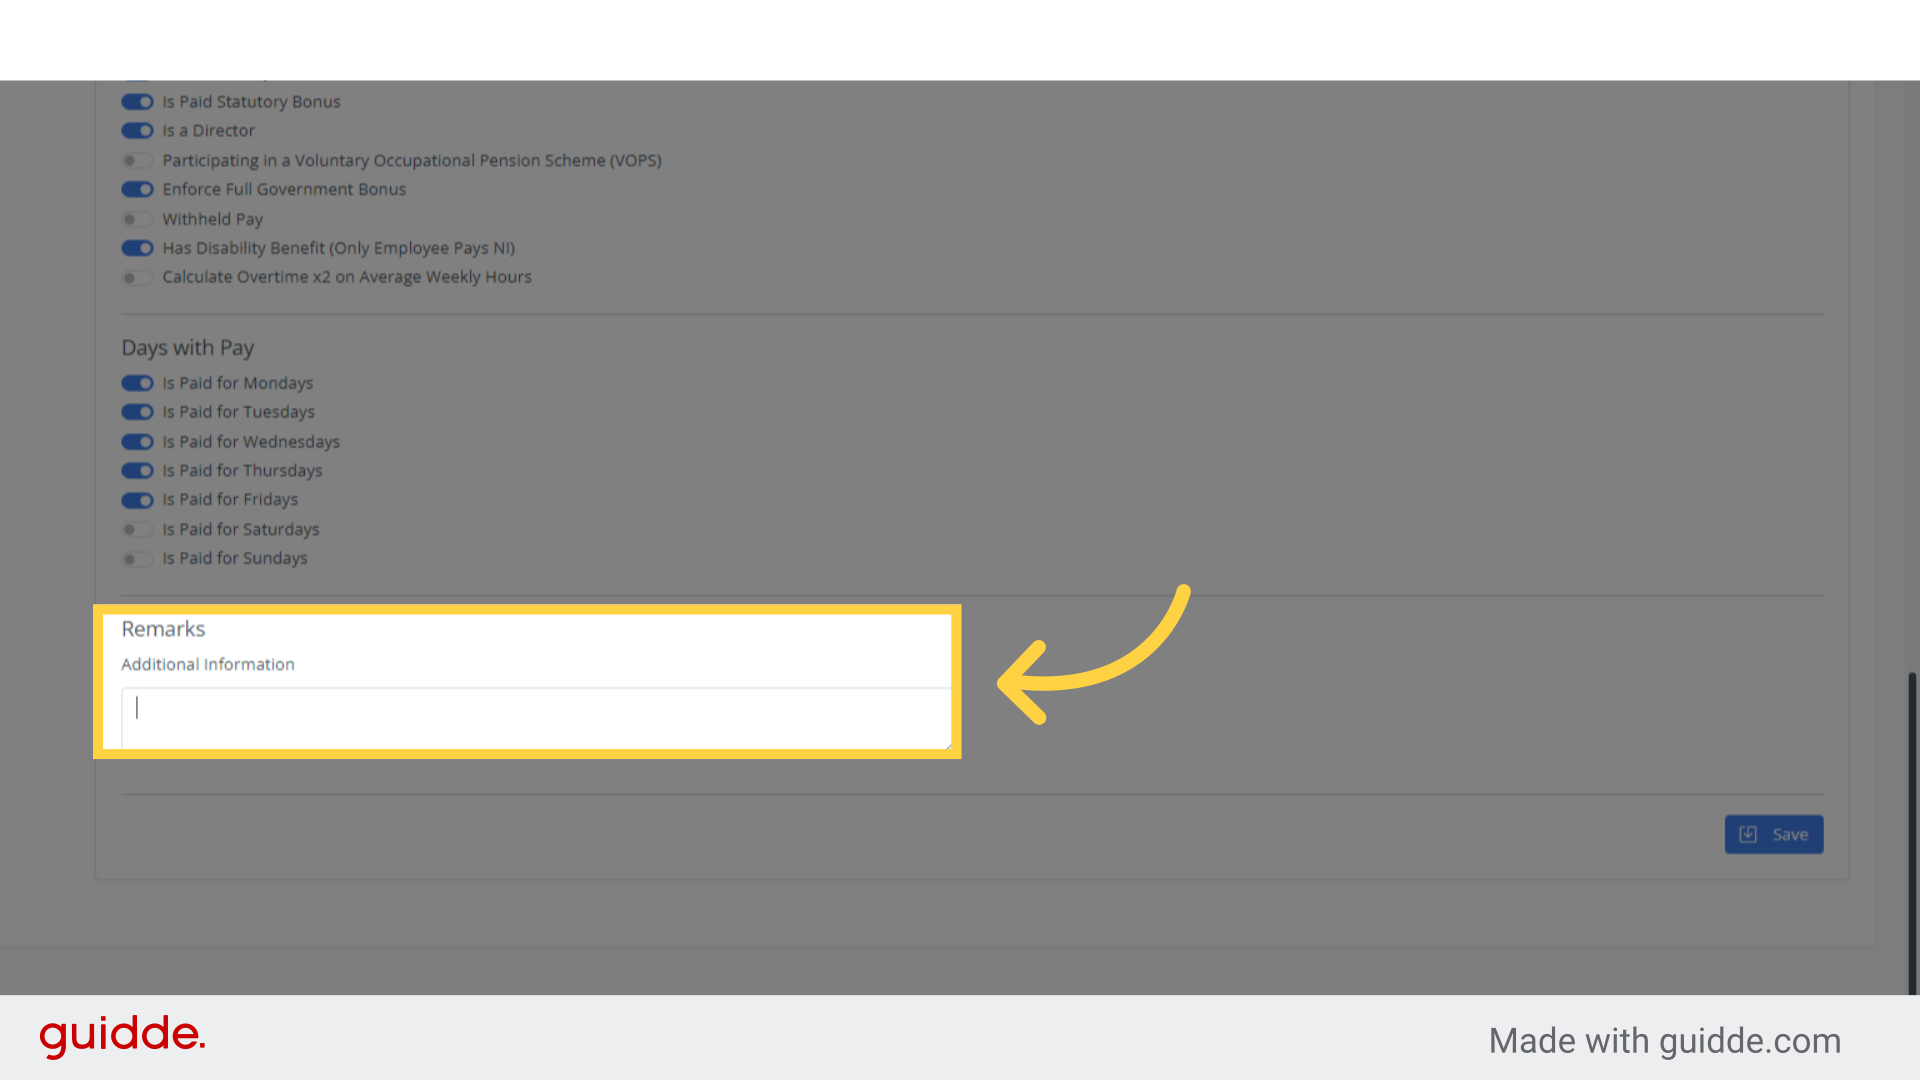
Once the necessary toggles are adjusted, the remarks tab is available for adding any additional information if desired.
Step 14. Click “Save” #
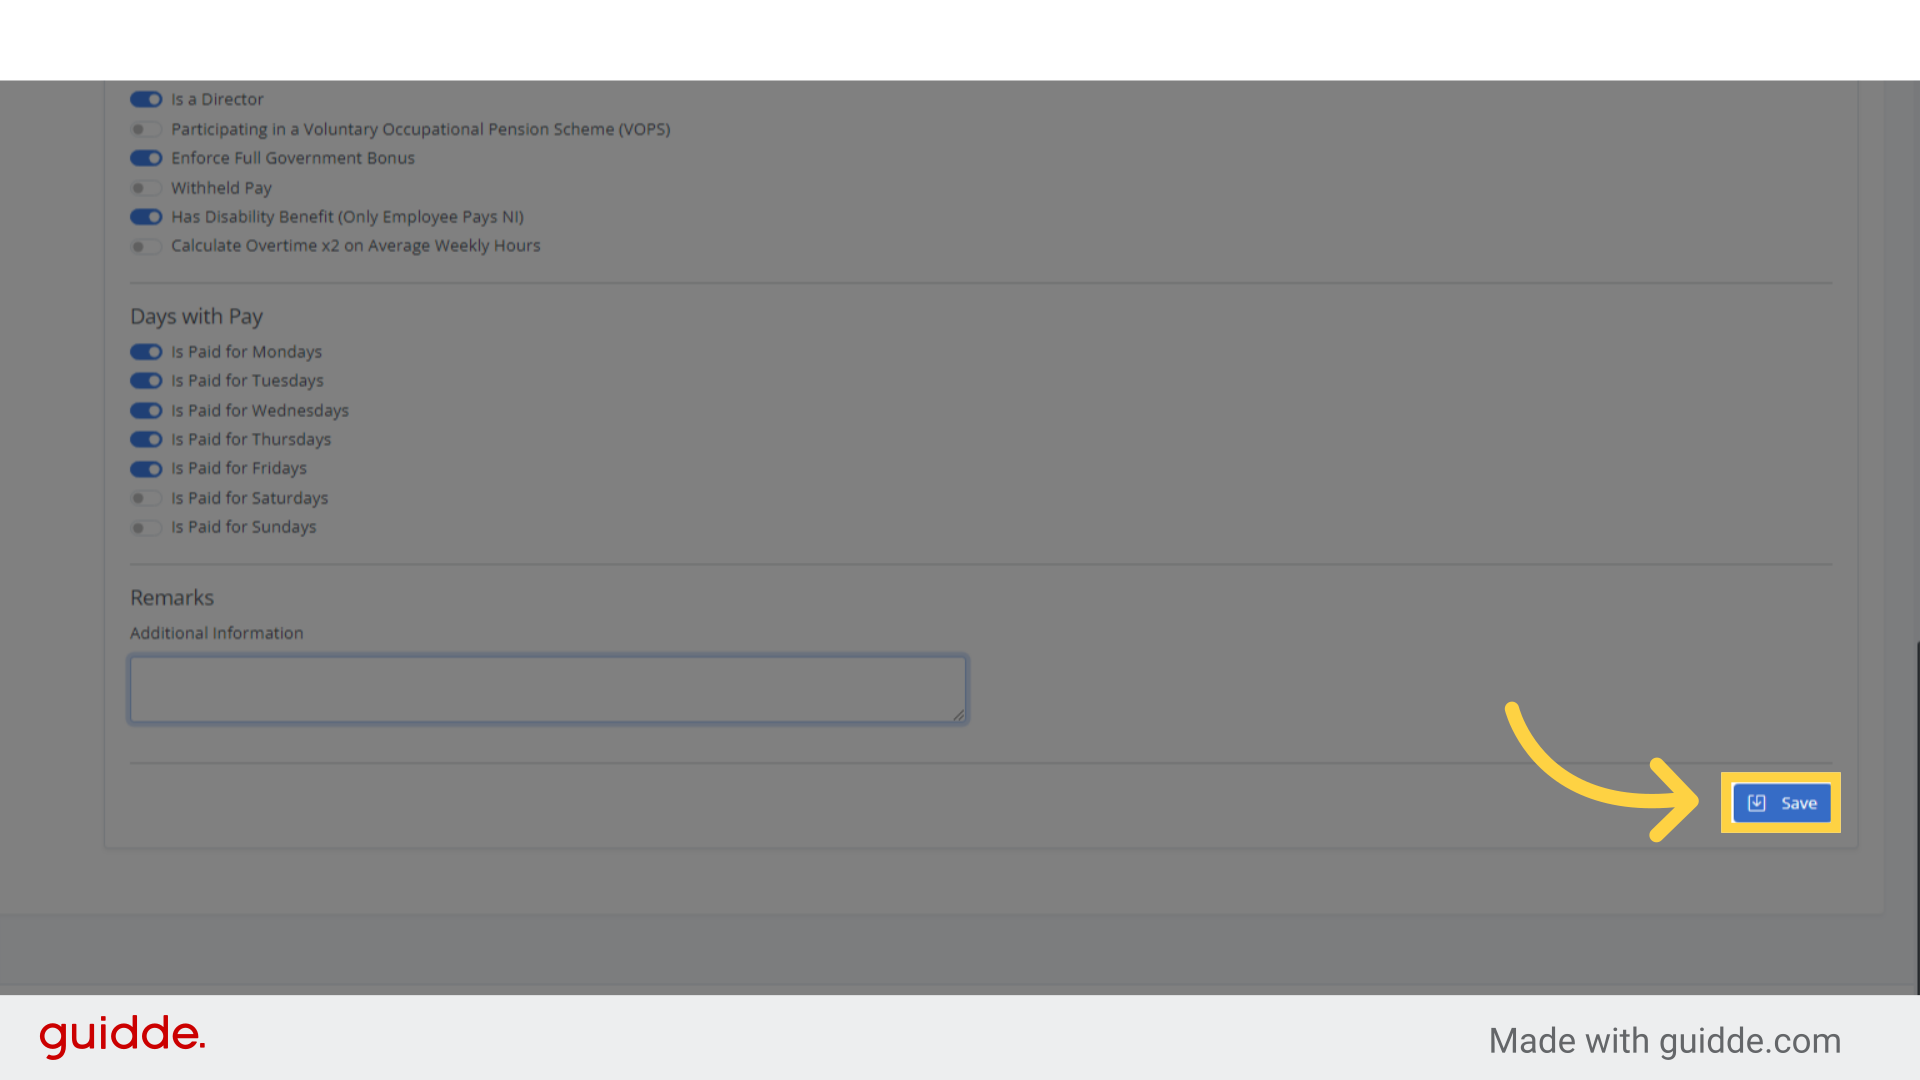
Once all the details in the payroll section have been entered, proceed by clicking on the “Save” button.
Step 15. Errors detected #
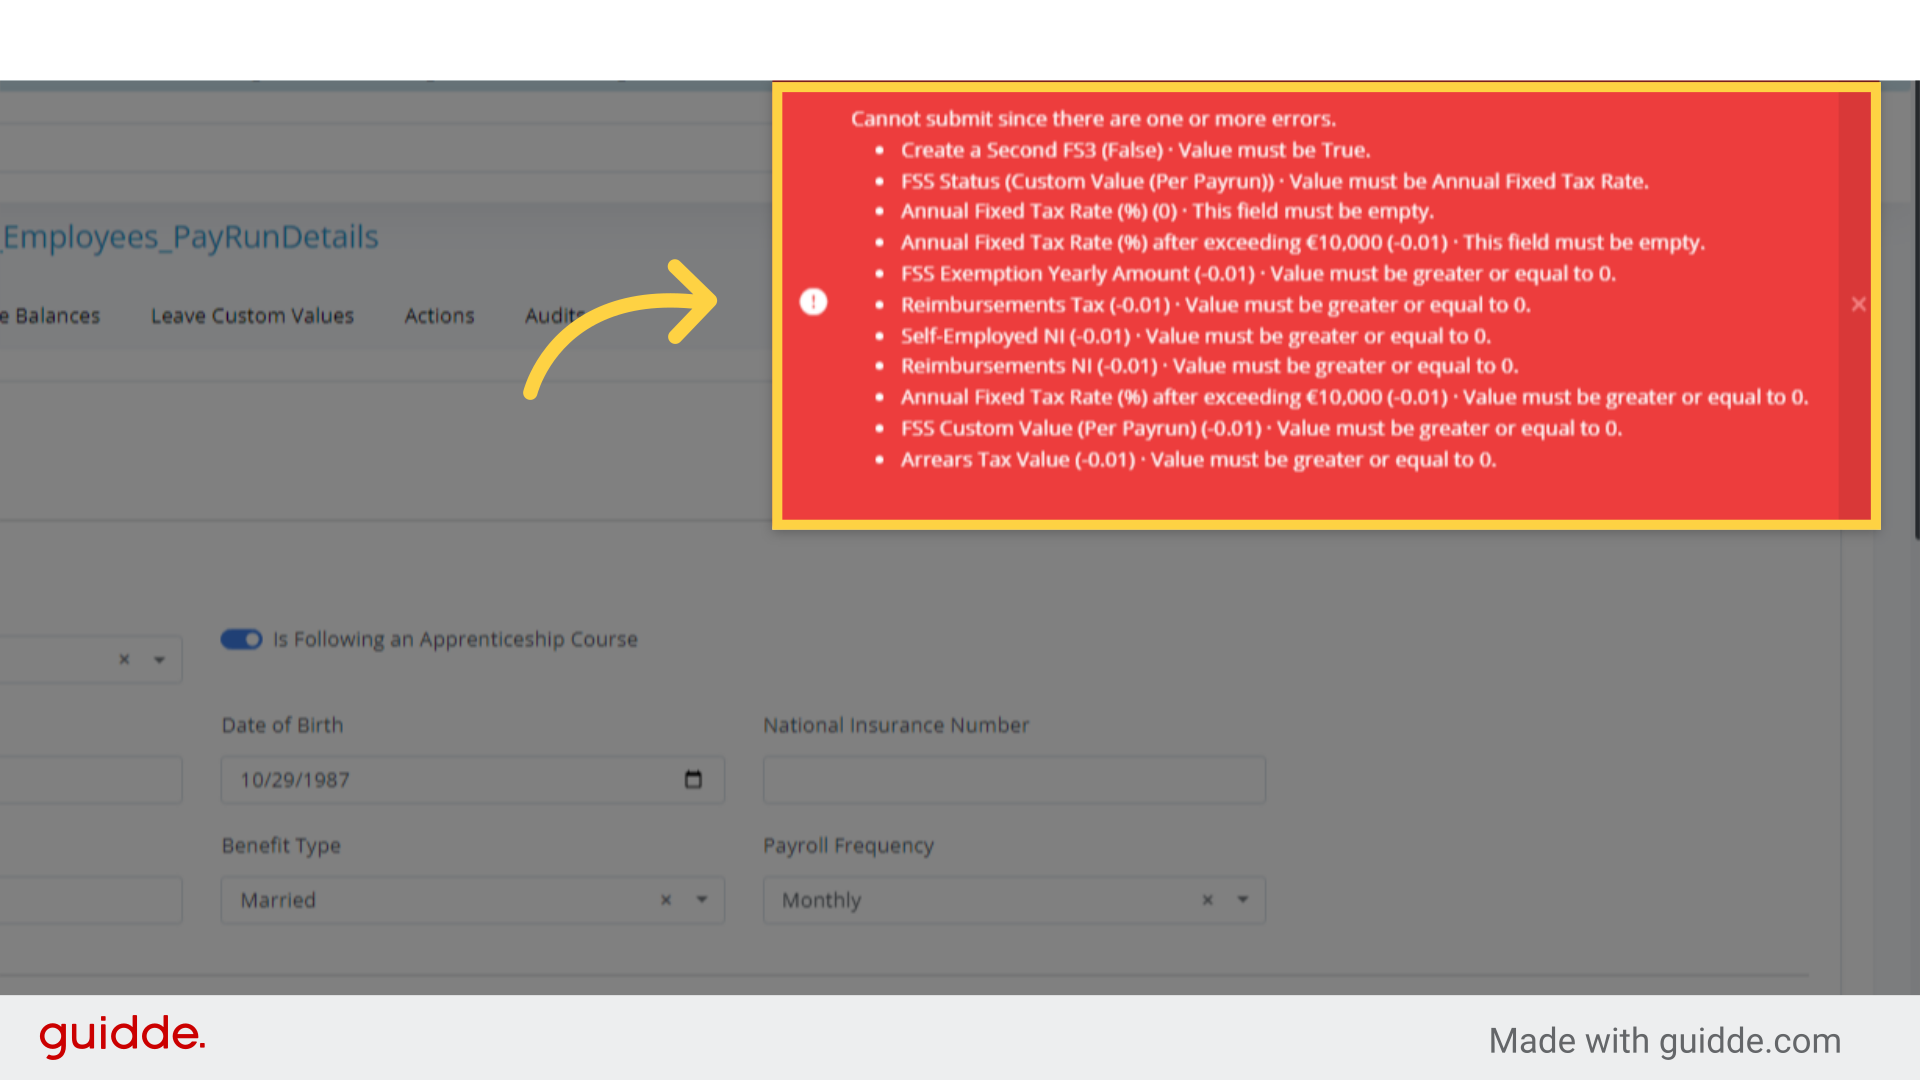
When you select “Save” and errors are detected, an alert box will display, indicating which required fields need to be completed or corrected. Make the necessary updates and save once more.