
Adding a New Clocking Using the Quick Actions Menu (Three-Dot Menu) – Calculated Clockings Page #
The Quick Actions menu (represented by the three-dot icon) offers convenient access to key functions for managing employee clockings. These include:
- Add New Clockings – Manually input additional clockings for a specific day.
- View/Disable Clockings – Review or temporarily disable clockings for a selected date.
- Override Date Schedule – Modify the working schedule for a particular day.
Note: This article focuses specifically on the Add New Clockings feature.
Step 1: Initiate the Clocking Addition Process #
Navigate to the Calculated Clockings page.
Use the Sort & Filter feature to locate the employee and the specific date for which you want to add a clocking.
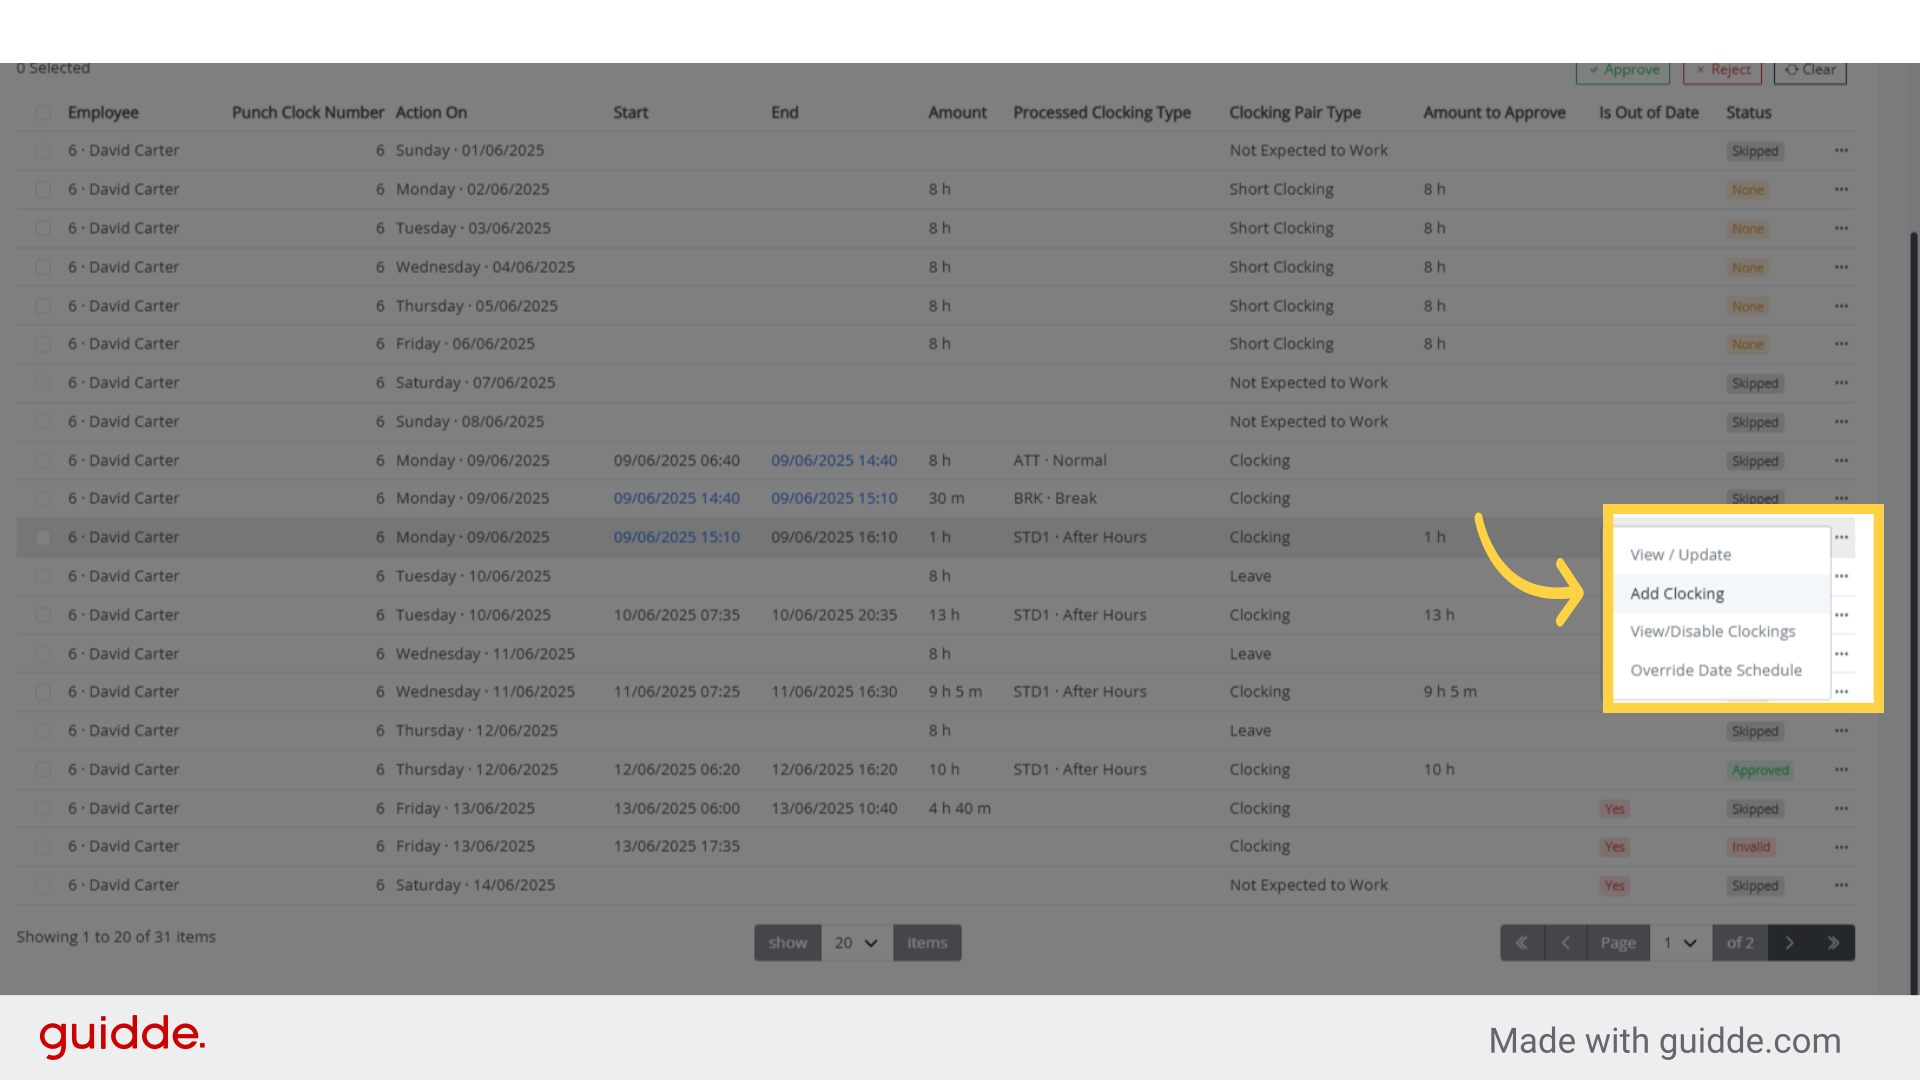
Click on the three-dot menu next to the date, then select “Add New Clocking” from the dropdown options.
Step 2: Select Clocking Time and Type #
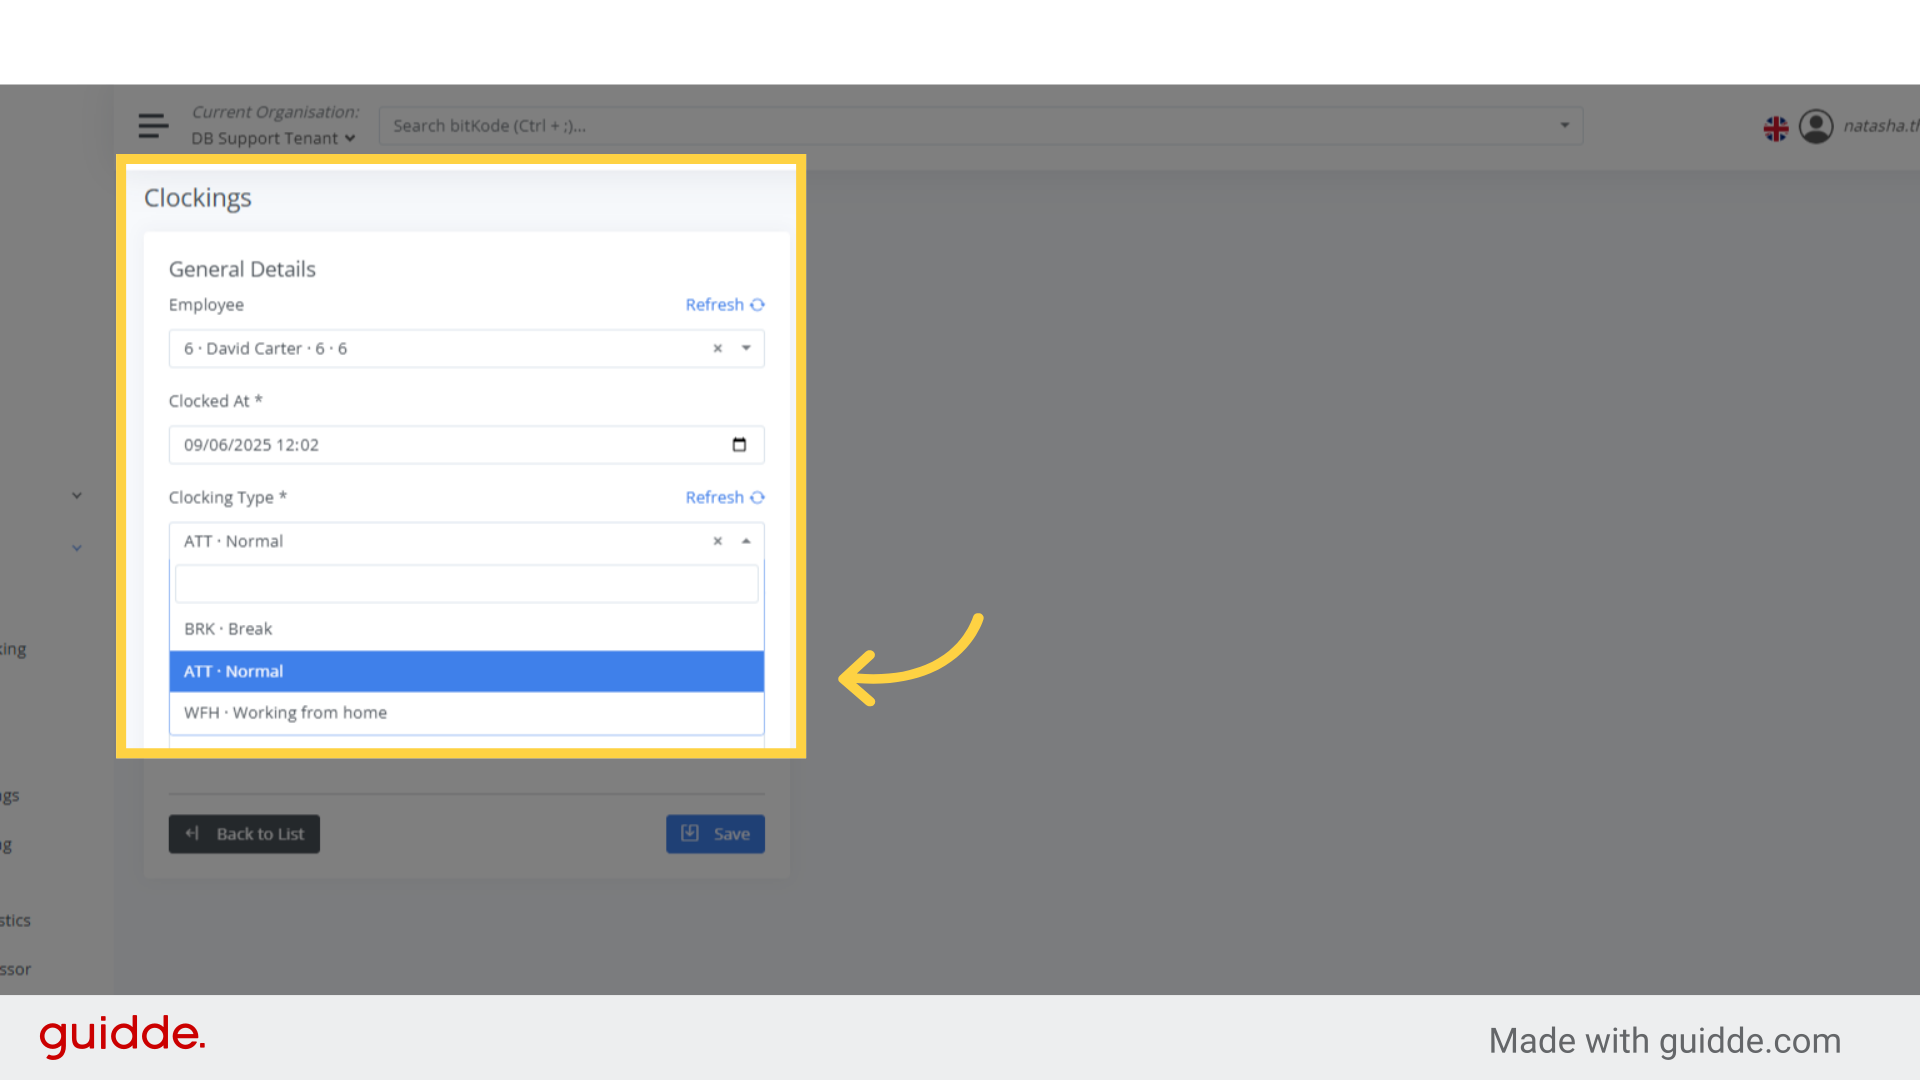
Choose the date -time and specify the clocking type.
Step 3: Save the Clocking Entry #
Once all details have been entered, click Save to confirm the new clocking.
Note: Any changes made using the Quick Actions menu will mark the affected day — and potentially subsequent days — as Out-of-Date. This status indicates that the data must be reprocessed to reflect the latest updates.
Related articles;


